How to Tune Your Bow in 15 Steps
Follow this preseason checklist to perfect your arrow flight

We may earn revenue from the products available on this page and participate in affiliate programs. Learn more ›
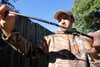
Some of my favorite deer rifles are inaccurate, at least by modern standards. But their handling, aesthetics, and sentimental value make up for their loose groups. It’s different with a bow. A bow may be pretty, it may point well, and it may be fast; but if the arrows it launches don’t fly straight and true every time, everything else is wasted. The good news is that when a bow doesn’t initially shoot well, it can usually be tweaked and tuned to do so. Some adjustments you can make yourself, others require the help of a good bow-shop pro. The shop I use is Hinton Archery in Murray, Ky., which is owned by Danny Hinton. Locals call him The Barrel-Chested Irishman. He’s a gruff, no B.S. guy who knows how to tune a bow. I sat down with him recently to nail down a concrete, easy-to-follow system for getting perfect arrow flight. Here it is, in 15 steps.
1. Evaluate the String and Cables
When you break out your bow for the new season, the first thing to do is have your bow-shop pro check the strings and cables, which deteriorate and stretch over time. This can result in rotated cams, shifted nocking points, de-flexed limbs, and even a potentially dangerous shooting situation. Ever seen a bow blow up when the string breaks? I have. It’s not pretty.
Strings and cables will show some wear from hard use on the outside, but they actually deteriorate fastest from the inside out. Most new strings will last three to four years. If you need a new one, you can either order from the factory or have your pro make a custom one. “Some factory strings are better than others. In my experience, Bowtech and Mathews have good strings right out of the factory, while Hoyt and PSE strings tend to stretch a little faster,” Hinton says.
2. Press and Twist
Strings and cables that are a year or two old may not need replacement, but chances are they have stretched enough to slightly rotate the cams (or cam) and cause some timing issues, not to mention shifting your nocking point and peep sight. “Twisting of the cables and string is the first step in tuning a bow and bringing it back into factory spec,” Hinton says. “You add twists to create more tension on the limbs and cams.”
3. Check Your Draw Length
“I’d guess that 70 percent of the guys who come into my shop shoot a bow that’s a bit too long for them,” Hinton says. “Everybody wants that extra half inch of draw length for increased speed.” But shooting a bow that’s too long can cause problems with shooting form and can also lay the groundwork for problems with your arrows–namely, with the spine (more on that later). If you have any doubts, double-check with your local pro to be sure your draw length is correct, and that you know the exact length of the arrows you’ll be shooting.
4. Find the Center Shot
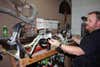
With the strings and cables set, it’s time to perfectly align your nocking point and arrow rest. This is called finding the center shot. It can be done with a laser center-shot tool, or an old-fashioned bow square, which is what Hinton uses. “There are intricate methods of measuring across the limbs to find the center shot, but it’s complicated, and honestly, I’ve never found it necessary. I use the bow square to get my nocking point and rest aligned and then make fine adjustments when paper-tuning (more on that in a bit, too).”
5. Align the Peep
Two seasons ago, I hunted a whole year not realizing that I was bending my neck to look through my peep sight. It was only after Hinton helped me set up a new bow that I realized my peep had been too low on the string. We set the new peep higher, and though it felt a bit different, I immediately began shooting better. You can get away with shooting your bow a few times before the peep is served into the string. Experiment with moving it up and down, and then serve it in so it stays tight only after you’re sure it’s where you need it. “The fastest way to get your peep alignment correct is to close your eyes, draw the bow, settle into your anchor point, and then open your eyes,” Hinton says. “You should naturally be looking right through the peep. If not, move it.
6. Find the Arrow Spine
The most common problem Hinton sees in his shop is hunters shooting an incorrect arrow spine. “Spine” is simply the arrows stiffness; the lower the number, the stiffer the arrow. For example, a 400-spine arrow is more flexible than a 340-spine arrow. All arrows flex when coming out of the bow before recovering and flying to the target. Slower bows–those with light draw weights, more rounded cams, etc.–impart less flexing on the arrow, and shoot best with a flexible spine. Faster bows require a more rigid spine, or the arrow will flex too much. Most arrow manufacturers have spine calculators on their websites. Hinton, like many pros, looks up the correct arrow spine for his customers with a software program called On Target.
7. Choose a Fletching
Not long ago, arrows fletched with feathers or long vanes with aggressive helical arrangements resulted in better arrow flight, especially with broadheads, for compound shooters. But that has changed. Short, stiff vanes like Blazers now provide outstanding arrow guidance, and are rigid enough to withstand repeated shooting through capture-style rests, such as a Whisker Biscuit. They’ve become the standard for most hunting arrows.
8. Find the Front of Center
An arrow’s flight is most stable when most of its mass is Front of Center (F.O.C.). Most experts recommend a F.O.C. of 7 to 11 percent. That number is calculated by first finding the balancing point of the arrow (with the point on) and measuring to it from the nock grove. Then you subtract the center of the arrow (overall length measured form the nock grove to the end of the shaft, divided by two) from the balance point and divide that by the overall length. And finally multiply by 100. Complicated, I know, but it’s worth it. If you’re a little light, you might consider using a heavier point; say 125 grains, rather than 100.
9. Weigh and Spin Test the Arrows
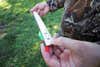
With your arrows crafted, the final step before shooting them is to weigh and spin-test each one. Obviously, you want them all to weigh the same. A couple grains difference won’t affect much, and is common, but much more than that can create problems. Spin testing is simply checking the arrow’s straightness. You can detect a problem by rolling your arrow across a flat surface narrow enough for the shaft to overhang on both ends. Wobbling on either end is not good.
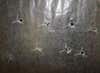
10. Paper Tune
Before hitting the range for a sight-in session, you should do a paper-tuning check. “A paper tune is a good, final way to double-check your center-shot and make sure you don’t have issues with your arrows,” Hinton says. “If you know everything is set up correctly with your bow, a bad tear on the paper can reveal problems. But it’s not fool-proof.” Hinton says it’s possible to get a perfect tear, even if something is out of whack on your bow. That’s why all the preliminary checks above come first. He also stresses the importance of shooting the bow yourself, rather than letting someone else shoot it. “For paper-tuning to work, you have to release the arrow flawlessly; little mistakes in form can also cause a bad tear. Shoot the paper several times, and when you’re positive you’re making good shots, and getting perfect bullet-hole tears, chances are the bow and arrows are tuned up and ready to go.”
11. Sight In with Field Points
First make sure you’re on the target at 10 yards, and then begin your sight-in session at 20. Some people like to shoot five-arrow groups. I like to shoot three, as it takes some fatigue out of the equation. Dial things in perfectly at 20 before stepping back to 30, and then 40. As a rule, I only sight in at one range per shooting session–again, to reduce fatigue. You’re not really practicing right now so much as you’re ensuring your bow is set up for practice.
12. Walk-Back Tune
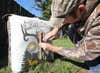
Stretch a piece of tape vertically on the center of your target, and add a small dot for aiming at the top of the strip. Shoot that dot at 20 yards. Back up to 25, aim at the same dot with the same pin, and shoot another arrow. Back up to 30 yards and repeat. Do the same thing clear out to 45 or 50 yards. Ideally, your arrows, while hitting progressively lower, should be in line vertically. If you notice a trend of all the arrows gradually “walking” to one side or the other of the tape, a fractional rest adjustment is in order. It’s a tweak you may want your pro to do. “We’re talking 1/64 inch, most of the time, when adjusting rests after walk-back tuning,” Hinton says.
13. Get Your Heads Examined
At this point, you should be able to set your target on an ant hill and use the insects crawling up its face for 30-yard field-point practice. But you’ll use broadheads in the deer woods–and that can introduce new problems. “Having a well-tuned bow and perfect arrows will fix most problems people have with their broadheads, whether fixed or mechanical,” Hinton says. “But not every broadhead, including from the same package, is always the same. I won’t name names, but I weighed six broadheads from a single package last season and found nearly 10 grains of difference between the heaviest and lightest one in the package. If you’re striving for precision, it’s a good idea to weigh those broadheads after taking them from the package. Then put them on your arrows and spin-testing each.”
14. Sight-In With Broadheads
With a well-tuned bow matched with the right arrows, there should be little difference between the point of impact of your field points and your weighed and spin-tested broadheads. As a rule, broadheads, especially fixed-blade broadheads, are less forgiving to shoot. So it’s critical to do your broadhead sight-in when you’re fresh. “Don’t screw on your broadheads to see what happens after you’ve been shooting for an hour,” Hinton says. “A few bad releases or a lapse in form can give you false results. When that happens, it’s tempting to start moving your sight or rest around. Don’t do it. Sight in your broadheads over the course of a couple days, making sure every shot you take is your best.”
15. Trouble Shoot
If you follow these steps, you’re probably not going to have many troubles for a year or more. Once a modern bow is in tune, it stays that way for a while. If there are issues, chances are it’s the user and not the equipment. But if you are having a problem, it can’t hurt to revisit each key component, starting with your bow and accessories, and then moving on to your arrows and broadheads. Before you make any major tweaks, go visit your bow-shop pro. Odds are, it something simple that you’re overlooking, and he’ll soon have you back in the woods and hitting where you aim. ––Will Brantley
How to Quick Tune Your Hunting Bow
Five things to check before hunting with your new package bow, if you don’t have time to do all 15 steps mentioned above.
Many off-the-shelf bow packages that include the bow, sight, rest, and quiver are billed as hunt ready. Just add arrows and you’re good to go, right? Well, not so fast. First you need to check these five adjustments to make sure your new setup is a straight shooter.
Draw Timing
Ask a friend to draw the bow. Lines or dots on most cams can help you check the timing. Watch closely when the top and bottom cams turn over. They should roll off peak weight and into the valley at the exact same time. If they don’t, take it back to where you bought it and tell them the timing is off.
Cam Lean
Take a straight arrow and lay it flat against the top cam. Your cams are straight if the arrow runs parallel to the string. If the arrow crosses the string, then there’s lean. Some lean isn’t the end of the world—the bow may still be true—but if your groups are wonky and there’s lean, take it to a good pro shop.
String Stop
A rubber suppressor that touches the string will decrease hand shock and help quiet the bow, but at the cost of a few feet per second of arrow speed. So move the stop into the string a few millimeters for a heavier dampening effect, or back it off for more speed. Careful: too much contact will prematurely wear your string.
Sight Level
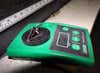
Clamp your bow in a vise and hold a torpedo level ($1.50; harborfreight.com) to the riser, adjusting the bow until the level’s bubble is center. When the bow is square, your sight bubble should be, too. If the bow is leveled but the sight bubble isn’t, break out the sight’s manual and adjust the first and second axis. Double-check it after you dial in your pins.
Center Shot
Check arrow-rest alignment by nocking an arrow and measuring the distance between the arrow at the front and back of the riser. If the measurements are slightly off—like a few millimeters—don’t sweat it. If they’re way off, loosen the rest and set it true. If your arrows aren’t grouping consistently, talk with a reputable pro shop about a walk-back or paper tune. ––Michael R. Shea