_We may earn revenue from the products available on this page and participate in affiliate programs. Learn more ›
_
Inflatable sleeping pads have become commonplace for backpackers and campers of all walks of life. While they provide ample insulation and comfort for a good night’s sleep outside, they are prone to leaks and deflation.
Using a foam sleeping pad is one way to get around doing repairs, but inflatable sleeping pads may work best for your needs if you’re a side sleeper or simply value comfort in the backcountry. You can take preventative measures to avoid leaks in a pad, but even the most cautious campers need a repair from time to time.
Whether on the trail or at home, a simple repair kit can go a long way. Once you have the kit though, you’ll need to know how to use it. Follow along to learn how to repair your sleeping pad if it has a small leak or if the valve is malfunctioning.
How to Repair Your Sleeping Pad
Some of these repairs, like a small leak, can also be applied to air mattresses. The best air mattresses
and sleeping pads often come with a small repair kit or a few patches, but we recommend investing in a repair kit to ensure you’re prepared.
Although leaks and tears can occur when storing or transporting, many happen in camp due to rocks, sticks, or dogs. One of the best ways to prevent leaks is to clear off the ground where you pitch your tent or plan to sleep. We also recommend having a ground tarp or footprint for an additional protective layer for your tent floor and the sleeping pad.
Even with clearing the area, things happen. The damage may come from a natural element, but it may also be a manufacturer error. Luckily, many well-known sleeping pad brands like Thermarest or NEMO, have limited lifetime warranties and perform repairs. So, if the repair is beyond your scope of knowledge and ability, or you don’t feel like doing it, you can send your sleeping pad back to them, and their experts can repair it.
If you plan on sending your pad back to the manufacturer, do your research to make sure they do repairs. Even if they don’t advertise that they do repairs outright, they may repair them for a small fee so it can be helpful to contact them directly.
Common repairs on an inflatable sleeping pad:
Small leaks or punctures
Rips or tears
Valve malfunctions
Not all of these are easy to fix. Fixing a small leak is far easier than fixing a large rip and often takes less time than fixing the valve. The good news is that once you’ve done it once or twice on your own, it becomes much easier, and if all else fails, remember that you can always send it to the experts.
Bonus Tip: Many air mattresses can be repaired in the same way an inflatable sleeping pad can. However, a more heavy-duty repair may be needed for mattresses with more PSI (pounds per square inch). As a repair hack, you can use tire repair kits designed for bicycle or car tires for mattresses with a higher PSI. These patches are meant to be put under more pressure and should hold longer.

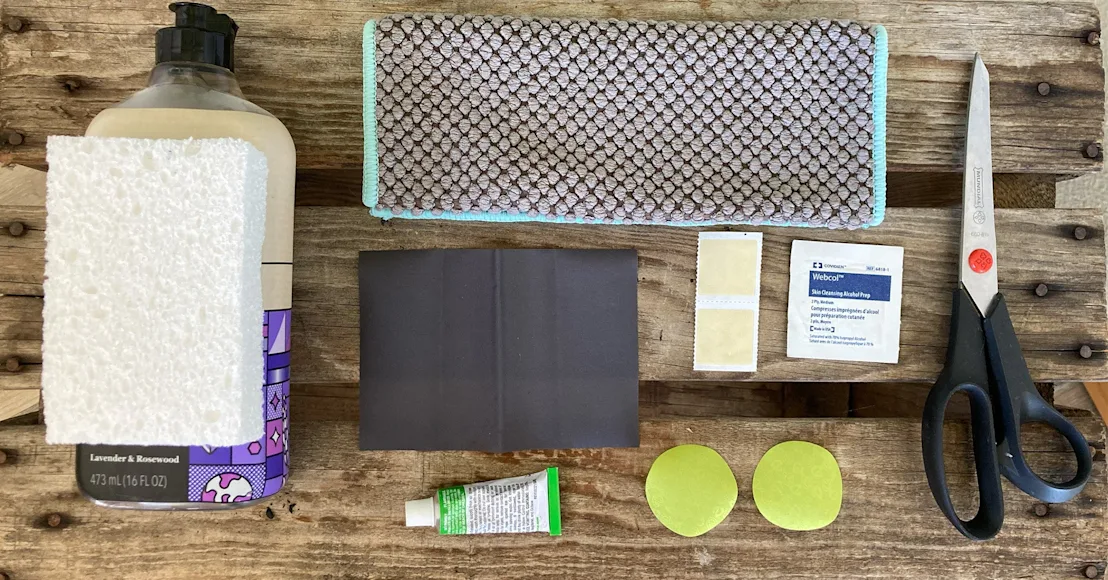
Example of sleeping pad repair materials
How to Repair a Sleeping Pad Leak
Potentially the most common repair needed on an inflatable sleeping pad is to fix a leak or a small rip. One of the major issues people find when trying to repair small holes is finding them. Large tears you can see, but for small punctures, it can be difficult to pinpoint exactly where the pad is releasing air.
Before we explain how to find the leak and patch the hole, you’ll need to gather your materials.
What you need to repair a sleeping pad leak:
Rubbing alcohol
Patch: tenacious tape
, sleeping pad patches
Scissors
Adhesive: Seam Grip
or Aquaseal
If you aren’t sure where the hole is located, then you’ll also need:
Soapy water
Spray bottle or sponge
Marker
How to Find the Leak
Whether you’re at home or in the field, finding the leak will be essentially the same. There are two main options: use soapy water or submerge the pad in water.
For either, the pad needs to be inflated completely. If you are near a body of water or have a tub large enough, you can submerge the sleeping pad into the water. Watch to see where the air is escaping by looking for air bubbles.
When submerging isn’t an option, or you don’t like that idea, you can use soap and water—having a sponge, or a spray bottle works best for this method. If you’re in the field, you can use a cloth or a towel. If you have a general idea of where the leak may be, focus your attention on that area of the pad. If not, start on one end of the pad and work your way down.
When using soap and water to locate a leak, use the following steps:
Fill a container with soap and water
Inflate the sleeping pad completely
Spray, sponge, or pour the soapy water onto the sleeping pad
Watch for bubbles to appear where the air is escaping
Once the leak is located, dry the area
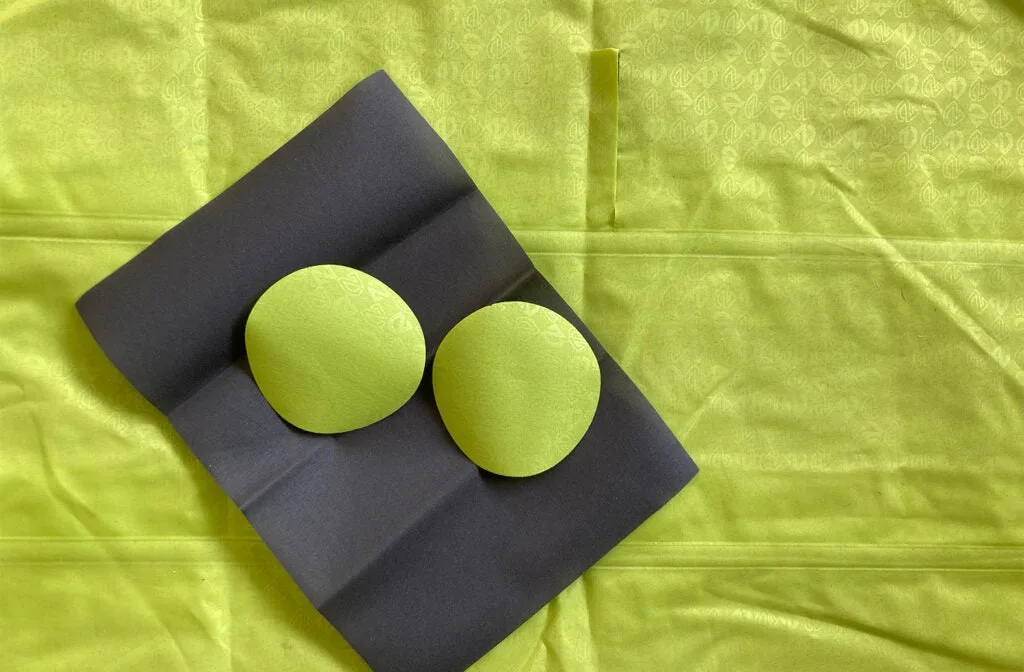
Make a dot or a circle with your marker on the area of the leak
Whether you’ve chosen to submerge the pad or use soapy water, it can still be tricky to locate the leak. When no air bubbles are present, squeeze the sleeping pad slightly to force more air out of the leak. If you don’t see any possible leak areas on the front or back of the pad, check the valve and seams.
Large rips can still be repaired using patches, but you may need to cut the patch to size.
Time to Patch the Hole
Once the hole has been located and marked, dry the area and begin the patching process. A similar procedure can be followed for larger rips and tears, but not all rips can be patched effectively. Use your best judgment, and if you’re unsure, contact the manufacturer directly to see if they can perform repairs. This may be especially helpful if the leak is on a seam.
How to patch a hole in your sleeping pad:
Deflate the dry sleeping pad.
Clean the area around the hole. Once it is brushed off and free of dirt or debris, use isopropyl alcohol to prep the pad for the patch. An alcohol wipe from your first aid kit
will work just fine if you’re in the field.
Let the alcohol dry, and then apply a thin layer of adhesive. The adhesive should extend at least a ½ inch out from the hole, but recommend going 1-2 inches around the hole for larger rips. Depending on the adhesive you use, it may need time to set (20-30 minutes). Most adhesives need to be slightly tacky to work well. So, read the adhesive directions carefully before moving to the next step.
If needed, cut the patch to extend at least ½ an inch out from the hole. It should at least cover the adhesive area but make it slightly larger just in case. It can be trimmed later if needed.
Apply the patch of your choice over the curing adhesive. If you are using a patch kit, read the directions thoroughly before following these instructions, as they may differ according to the type of patch and adhesive.
Press the patch down, smooth it out to eliminate air bubbles, and ensure it adheres to the pad.
For best results, let the patch sit and adhere overnight (8-12 hours).
Reinflate the sleeping pad to see if there is still a leak. If no air is escaping, your handiwork has paid off, and your sleeping pad is ready for use once again.
Since many inflatable sleeping pads come with a patch kit, follow the directions provided in that kit as they may be specific to the company. Patches included in a supplied kit are likely the same material as the pad, making it easier for the fabrics to adhere together.

Repair kit provided with one of NEMO’s sleeping pads. No adhesive included.
How to Repair a Sleeping Pad Valve
Self-inflating pads, in particular, may need to have the valve replaced from time to time, but other sleeping pads may as well. The valve may leak, maybe your dog chewed it up, or it got smashed in a car door accidentally. Whatever the reason, the good news is that valves aren’t always that hard to fix.
All you need for this repair is a sleeping pad valve repair kit and a pair of pliers. Try to get a kit directly from the brand of sleeping pad you have to ensure it will fit properly and continue to function as designed.
Once you have the repair kit, follow these steps to repair the valve:
Remove the broken valve by opening it as far as possible. Then, using a pair of pliers, grab the valve cap at the base. Hold the sleeping pad material below the pliers and pull away from the pad while twisting and pulling the valve straight out.
Clean the valve area before moving to the next steps.
Get your new valve and adhesive. Apply a thin layer of adhesive around the outside of the barbed valve end.
Carefully twist and push the new valve until it has fully seated into the valve opening on the pad. Avoid pushing the valve too far past the base.
Wipe away the excess adhesive.
Let the adhesive cure for at least three hours.
Once cured, inflate the sleeping pad and let it sit inflated for 8-12 hours to make sure the valve isn’t leaking.
The repair kit you purchase may have instructions that differ slightly. Follow the manufacturer provided instructions for the best results. If you are unsure if you want to attempt this fix or if you can’t find a valve kit for your pad, reach out to the manufacturer to see what your other repair options are or if it is covered under their warranty.
FAQs
Q: Can I use super glue to repair a sleeping pad?
An adhesive alone will not fix a hole or rip in a sleeping pad. We recommend using adhesives like Seam Grip
or Aquaseal
as they are waterproof. Keep in mind that the adhesives work in tandem with a patch. Some patches will have an adhesive side, while others require the use of an adhesive applied to one side.
Q: Does tenacious tape work on sleeping pads?
Yes, tenacious tape
is an excellent option for patching sleeping pads. Using tenacious tape alone can work for small, quick in-field fixes. If you have an adhesive with you, we recommend applying the adhesive and then the tenacious tape for a more secure and longer-lasting repair.
Q: How do you fix a self-inflating sleeping pad?
Repairing a self-inflating sleeping pad works the same as a standard inflatable pad repair, whether a patch or a valve repair. If you have a new self-inflating sleeping pad that isn’t inflating, you should know that it won’t inflate fully by itself the first time. To help it along, blow air into the valve with your mouth.
Q: How do you find a slow leak in a sleeping pad?
To find a slow leak in a sleeping pad, use the method described above. Using soap and water works great. You can also fully submerge the inflated pad to find where it is leaking.
Q: How do you make a homemade air mattress patch?
While it isn’t our first choice, you can make a homemade patch for an air mattress or a sleeping pad. Since these products are made from synthetic materials, using synthetic fabric or durable plastic works best. Some options include material from a rain jacket, shower curtain, or fabric from an old tent or sleeping pad. Once you have a material chosen, cut a patch out, clean the area, and apply using the adhesive of your choice using the direction above.