_We may earn revenue from the products available on this page and participate in affiliate programs. Learn more ›
_
The doldrums of winter will soon lift, and it will be time to wave goodbye to indoor leagues and start shooting your bow outside. But before you begin stretching the distance at outdoor targets, I’ve got some advice that is easy to implement and all but guaranteed to improve your accuracy all summer long and into the fall hunting season. It’s so surefire, you’d think everyone who shoots a slider sight would be doing it, and yet most do just the opposite. It’s this simple: Take your time sighting in before choosing a sight tape. I mean, really stretch it out.
I realize that many of today’s top-end sights, especially digital models, are designed to make the process of sighting in easier. I’ve read lot’s of marketing promises, as well as product manuals, that explain how some sights—digital, fixed-pin, and both single- and multi-pin movers—can be sighted-in to 60 yards after shooting only a couple of arrows. Yes, it is possible. But I sure don’t recommend it if you want to be the most accurate archer you can be. And I especially don’t recommend it if you shoot a slider that requires a sight tape. Pins can always be tweaked if they’re off, but a sight tape that isn’t perfect has to be thrown away and replaced with a new one.
I love long-range practice, and as a western bowhunter, I feel very confident taking a shot at an unsuspecting animal out to 70 yards. For my arrow to find its mark, though, the sight tapes on my single- and multi-pin slider sights must be perfect, and sight tape perfection is not a process you can rush. It being the off-season, you’ve got all the time in the world right now, so use it.
Why You Can’t Rush Sighting In
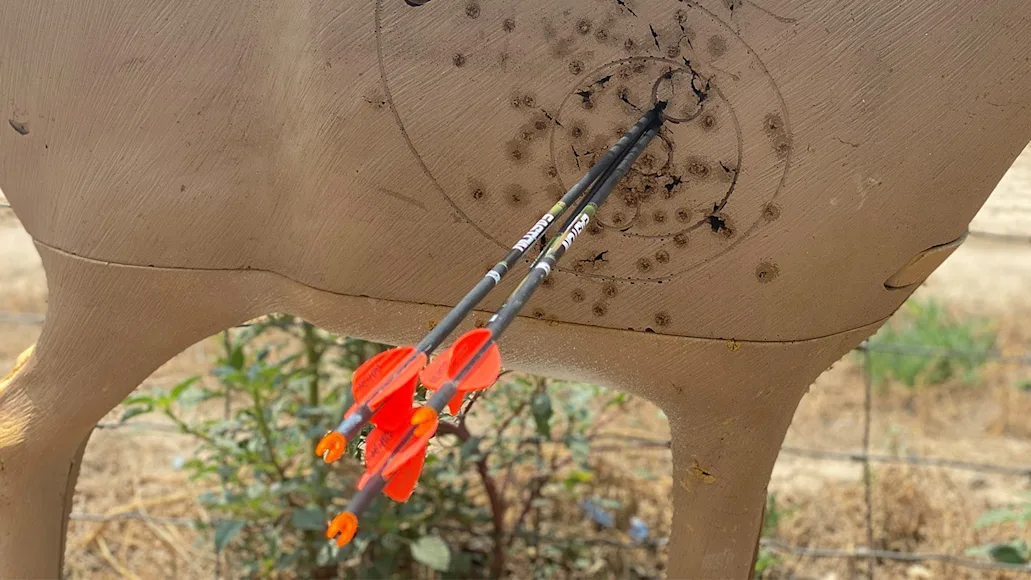
Don’t mark that top-pin line until you’ve proved it on the range with plenty of arrows. Jace Bauserman
Before we dive into the how-to part of building your sight tape, let’s talk about why it’s so important no to be in hurry. Everyone realizes that it takes a while to get familiar with a new bow, but we can forget that the same holds for getting reacquainted with an old one if you haven’t been shooting in a while, or shooting to outside distances. So, say you pick up your bow in the spring and spend a few hours getting your bow dialed in from 20 to 60 yards, and then you go through the sight builders’ recommendations on choosing the correct sight tape. Chances are good when you go to shoot the next day, there will be a slight change in your grip, anchor, or how you’re looking through your peep. You can be dead-on at various distances one day and a little high or low the next. Why? Because you just haven’t shot enough arrows through your bow at all the distances yet to develop a shot process that is 100-percent repeatable, and now you have to scrap your sight tape and start over.
How To Set Up the Perfect Sight Tape
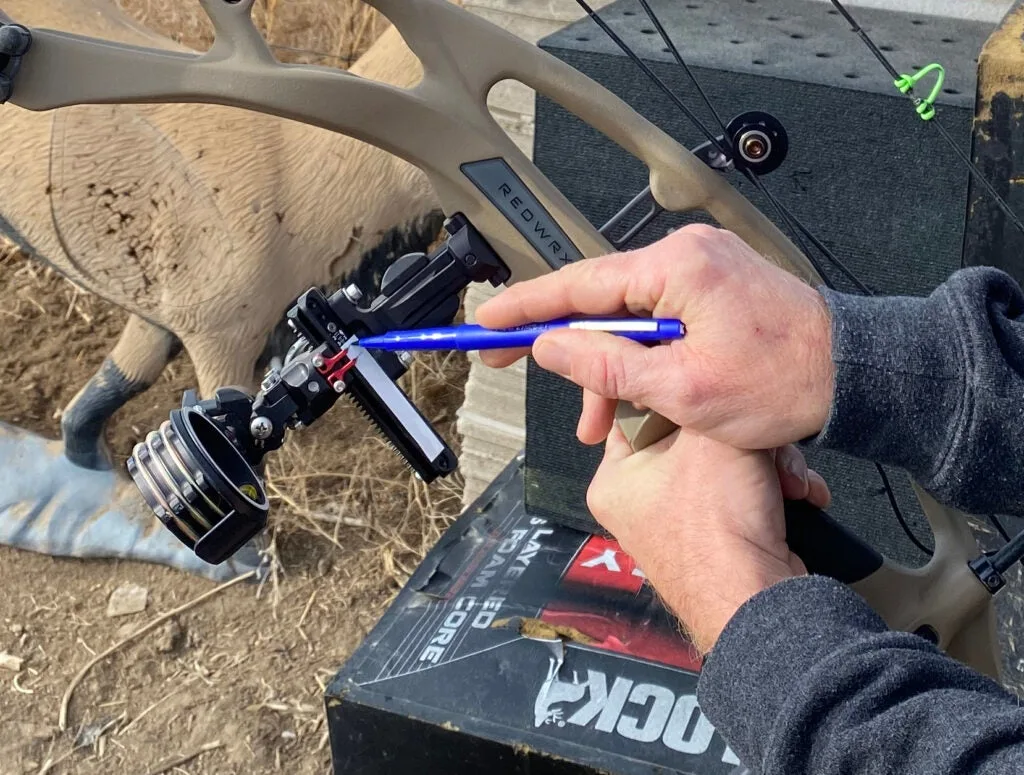
Follow your sight-maker’s guidelines for choosing the right sight tape, but only after you’ve completed the steps below. Jace Bauserman
I can’t tell you how many buddies I’ve heard rave about how they got dialed in out to 100 yards in a single day only to watch them shooting a few days later and using a Sharpie to make scribbles on their “perfect” sight tapes. So, let’s get this right. Here’s how in 5 simple steps.
Step 1: Sight In for Your Top Pin
Most sight manufacturers provide a blank tape. Start by attaching this one to your sight, and then spend a day finding your perfect zero—and by zero, I mean smoking the center of the center of a dot at your top pin’s—or single pin’s—distance (usually 20 yards). I see too many archers shoot a half dozen arrows at 20 and call it good. I recommend taking one full day at least to sight in your top pin. If this pin is off, all your other distances will be off.
Step 2: Confirm Your Top Pin Mark
The next day, shoot that top pin again to make sure it’s still right. If it’s still perfect, make a light mark with a pencil on your blank tape as an indicator for your top or single pin. Now, put the bow away for a few hours before you come back and double-check that top-pin mark. If you’re off, even a little bit, adjust your sight or pin up or down (always follow your arrow) and make a new mark. Now put the bow away for the day.
Step 3: One More Time
The following day, repeat the process. Shoot several arrows at your top-pin distance. If you need to adjust your sight, do so and make a new pencil mark. Then put the bow away for a few hours or until the next day and then repeat the process. You can take several days on this if you want; the more you prove that your top pin mark is perfect, the more confident you’ll be going forward.
Step 4: Sight In at 40 Yards
Most multi-pin and single-pin movers ask the archer to dial in at 20 and 60 yards for proper-sight tape selection. I prefer to get dialed at 20 and then spend a day or more shooting at 40 yards and proving my mark at that distance before moving to 60. After several days shooting at 20, you’ve got a good feel for your bow and your shot process. That’s good, but don’t get overconfident. Start the next couple days by confirming your 20-yard mark again, then confirm your 40, making slight moves if necessary.
Step 5: Sight in at 60 Yards
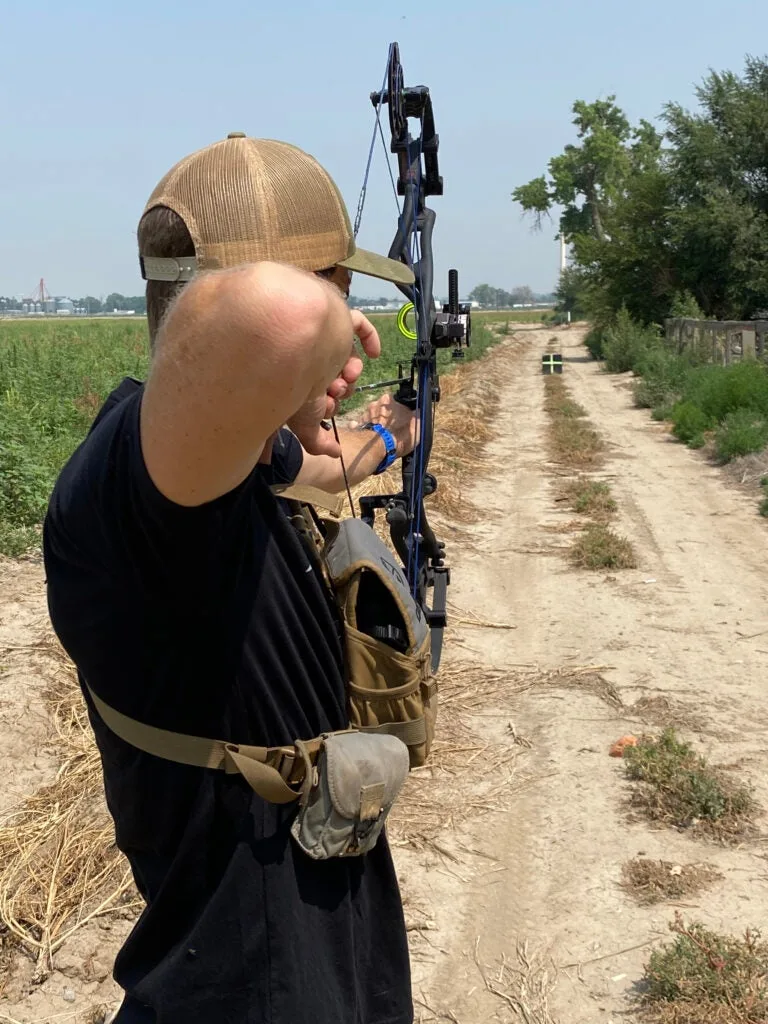
The author gets dialed in at 60 yards. Jace Bauserman
Dialing in at 60 yards should take you at least two days. How accurate your sight tape is beyond 60 yards will be dictated by how perfect your 60-yard mark is. So prove the distance over and over. Take breaks from shooting throughout the day, and then, at the end of day two, make your final 60-yard mark. Then prove all three one more time.
Step 5: Select and Confirm Your Final Sight Tape
Now it’s time to select your final sight tape by following your sight manufacturer’s guidelines. But don’t call it good once you place your tape on your sight. You’ve got one more job to do if you really want to get this exactly right: Prove each 5- and 10-yard setting all the way out to your farthest practice distance. It should go smoothly, but you need to know now if it doesn’t.
In the end, the process shout involve hundreds of shots. But the entire time, you’ll be building confidence, and you’ll know that when you dial to exact yardage, the arrow will find its mark if you do your part. All that’s left to do after that is keep practicing through the summer so that it all pays off in the fall.