


_We may earn revenue from the products available on this page and participate in affiliate programs. Learn more ›
_
Modern fish finders offer a lot of features in a user-friendly interface to help increase angler’s success. In fact, the hardest part of using the latest fish finders is installation. Advanced side-scan and liveview sonar using larger transducers require special consideration. To get the best results, learning how to install a fish finder is the first step in harnessing the power of most modern electronics.
Fish Finder Basics
Since the first sonar flashers were introduced decades ago, all fish finders work on the same principle. There are three main components of a fish finder: display, transducer, and battery. The transducer sends a signal through the water. When the signal hits a fish, structure, or the bottom—it bounces back to the transducer. The transducer transfers the return signal to the display unit, which interprets it into images on the screen.
Over the past decade, there have been incredible advances in sonar technology. This is what anglers today are working with:
Traditional sonar: uses a single cone-shaped signal
CHIRP sonar: uses two signals for a stereo image of the bottom and structure
Downscan sonar: uses a high-frequency signal for a more detailed image
Downview sonar: uses a high frequency signal for a three-dimensional view of structure below the boat
Sideview sonar: shoots a high frequency signal to either side of the boat
Liveview sonar: uses a directional transducer to provide a video-like image of fish swimming
The best news is powerful sonar options are available in more units at greater price levels for anglers fishing out of small fishing boats
, kayaks, and center consoles.
A properly installed fish finder will help locate structure, drop-offs, and bait. Humminbird
How to Install a Fish Finder in a Kayak
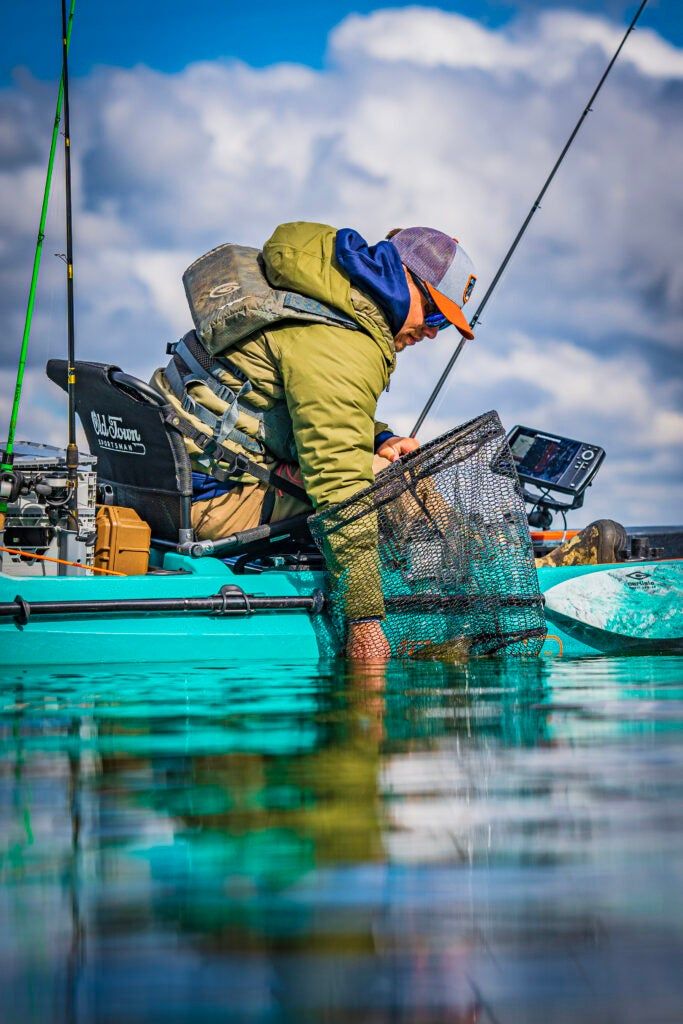
Kayak anglers demand the same advantages their boat-bound counterparts enjoy, and the best electronics are no exception. With more features available in smaller units, kayak anglers can have all the bells and whistles.
Installing a fish finder on a kayak is now easier than ever. The best fishing kayaks
are designed with special rigging to accommodate the transducer and route cables to the battery and display. If the kayak isn’t set up for a fish finder, after-market accessories make it possible to easily install electronics that anglers require.
To install the display, choose a place on the kayak within reach but out of the way. Mount the display on a gear track for more versatility. For a stronger connection, use a permanent mount bolted to the kayak.
Most fishing kayaks have a special scupper or cavity to accommodate the transducer below the water. If the kayak doesn’t have a transducer pocket, install the transducer on a flexible arm that dangles over the side of the kayak. Or, use silicone adhesive and mount the transducer inside the kayak hull; the signal will shoot through the plastic.
Install the battery below deck and close enough to the display to run the power cable. Either route the cable through a hatch or drill a hole through the deck and cover it with a wire cap.
A 12-volt, 10-amp-hour battery will run a fish finder for several days. Use a special battery box or rig a sling to keep the battery out of the water that will gather in the bottom of the hull.
The most important consideration when adding a fish finder to a kayak is how to remove it. Since the display and battery will have to be removed after each trip, ensure the battery and display mount are easy to access.
How to Install a Fish Finder in a Jon Boat
Adding a fish finder to a Jon boat, skiff, or bass boat is easy. In fact, many anglers install two fish finders, one near the driver’s seat or tiller and the other in the bow near the trolling motor.
To mount the display, use the standard base included with the fish finder. For a more versatile installation, install the display on a gear track and adjustable track mount base.
Once the display is installed, attach the transducer to the transom. Follow the manufacturer’s instructions to line the transducer up with the water level for the clearest signal. Run the transducer cable over the transom, using tabs to secure the cables.
If the boat has a circuit board, connect the power line to one of the free outlets. If the motor runs directly off a 12-volt battery, attach the power cable to the battery with an inline fuse.
The optimal set-up on a small boat places an additional display on the bow. Networking the second display to run through the transom transducer is easy, but attaching a second transducer to the trolling motor offers another view of structure and fish.
Attaching a sideview transducer to the trolling motor offers a clear image without turbulence. Liveview sonar requires the transducer to turn in the direction of the target. Connecting the transducer to the trolling motor allows the transducer to turn with the motor for a 360-degree view around the boat.

Quality fish finders can easily be installed on fishing kayaks with the proper accessories. Humminbird
How to Install a Fish Finder in a Center Console
Installing a fish finder in a center console is similar to installing a fish finder in a Jon boat. The easiest option is to attach the transducer to the transom and run the cable over the stern.
For the best sonar image, anglers with center consoles install a through-hull transducer. These transducers mount under the boat with the cable running through the hull. There is an uninhibited signal and return since a through-hull transducer is ahead of the motor and away from turbulence. Since this installation requires a hole in the boat hull, we recommend a professional do the job.
Once the transducer is set, use an electrician’s snake to route the cable under the deck and to the display.
There are many options for positioning the display unit. In addition to installing the display on a gear track or factory bracket, many center console boats are designed to allow the fish finder display to be flush mounted to the console. The advantage is a solid mount that doesn’t take up space and protects the back of the display unit from moisture.
To flush mount the fish finder screen, use the template included with the instructions. Cut the outline of the display and tape it in place on the console. Be sure there is clearance for wires behind the panel. Tape around the template and use a handheld jigsaw or similar saw to follow the line.
With the transducer and display in place, connect the power cord to the electrical panel. Use mount head cable ties to route the cables to the display unit. Modern electronics are plug-and-play. After installing the parts and running the cables, turn on the unit and go fishing.
Last Word about Fish Finder Installation
Before starting the installation, remember the old adage: measure twice and drill once. Take a minute to mock up the display unit, transducer, and battery. Make sure the cables will reach, and the display will not be in the way of fishing. Be careful to follow the manufacturer’s recommendation when installing the transducer at the correct depth. Too deep, and the transducer will send up a roostertail. Too shallow, and the transducer won’t send a strong signal. And always exercise extreme caution running power cables and batteries to avoid damage to electronics or the boat. With the right fish finder installation, you can get the most out of your electronics for years of finding fishing.
Read Next: Garmin Striker 4 Fish Finder Review

THE 1871 CLUB