Building a signal fire is an essential skill for anyone who enjoys spending time outdoors. Whether hiking, hunting, or fishing in the backcountry, knowing how to create a signal fire can be a lifeline in emergencies. In this guide, we will cover the steps to build an effective signal fire that can be seen from a distance, ensuring that you can attract the attention of rescuers or passersby when needed.
Read Next: How to Start a Fire
Step 1: Choose the Right Location
The location of your signal fire is crucial. It needs to be visible from as far away as possible. Look for an open area, away from trees and other obstructions that could block the view from the sky or a distance. High ground is often the best choice because it offers the most comprehensive visibility. However, ensure the location is safe, and the fire won’t spread uncontrollably. I like to choose areas on green grass when it is available. The variance of the color of the grass and those burning is helpful to make it more visible. It also helps to keep the fire from spreading. Remember that ground searchers complete most search and rescue events, not air assets.
When choosing your campsite, keep this in mind as well. Searchers are trained to look everywhere, but statistically, lost persons go to high ground or are near water so that they will focus on some resources there. You are more likely to be found if your signal fire can be in one of those two places.
Step 2: Gather Materials
You will need four materials to build your fire: tinder, kindling, fuel, and signaling material.
Tinder
Tinder is a material that will catch fire easily and quickly—items like dry grass and thin and dry bark shavings (think cedar bark). You can also create this material with patience and a sharp knife. Please do not pick up tinder material directly from the ground where it is likely to have moisture. Find material hanging dry in a tree or raised from the ground from fallen branches. For Tinder, you want stuff that is as dry as possible. If it is sourced up and off the ground it will gain more sunlight and wind that serves to dry it out. Once your fuel is lit, add kindling to grow the fire.
Kindling
Kindling includes slightly larger sticks and branches that can catch fire quickly but burn longer than tinder. When it is available, I like to use pine, white birch, hemlock, or similar species with resin. This helps the wood catch faster. This also makes it burn quickly, so your fuel choices will help keep it going longer.
Fuel
Fuel are large pieces of wood that will keep your fire burning for a long time. Look for dead, dry wood thick enough to sustain a fire. I like the hard, dense woods for this when it is available. Wood such as oak, hickory, ash, or similar are good choices. They require more effort to get going, but they burn long and hot when they do.
Signaling Material
Signaling material will bring attention to your position for those most likely to find you. More often than not, in most searches, you will have ground searchers and not air assets looking for you. At night, a fire brings attention to your position in the dark. With a sea of green, grey, and brown natural materials, you want to stand out from those colors. Green vegetation on top of the previously mentioned materials will make a thick white smoke. Burning anything plastic, rubber, or petroleum-based in the snow will put off some black smoke. I know of one story where a lost person on the side of the road burned their spare tire to put off lots of black smoke, alerting searchers to their position.
Step 3: Prepare the Fire Site
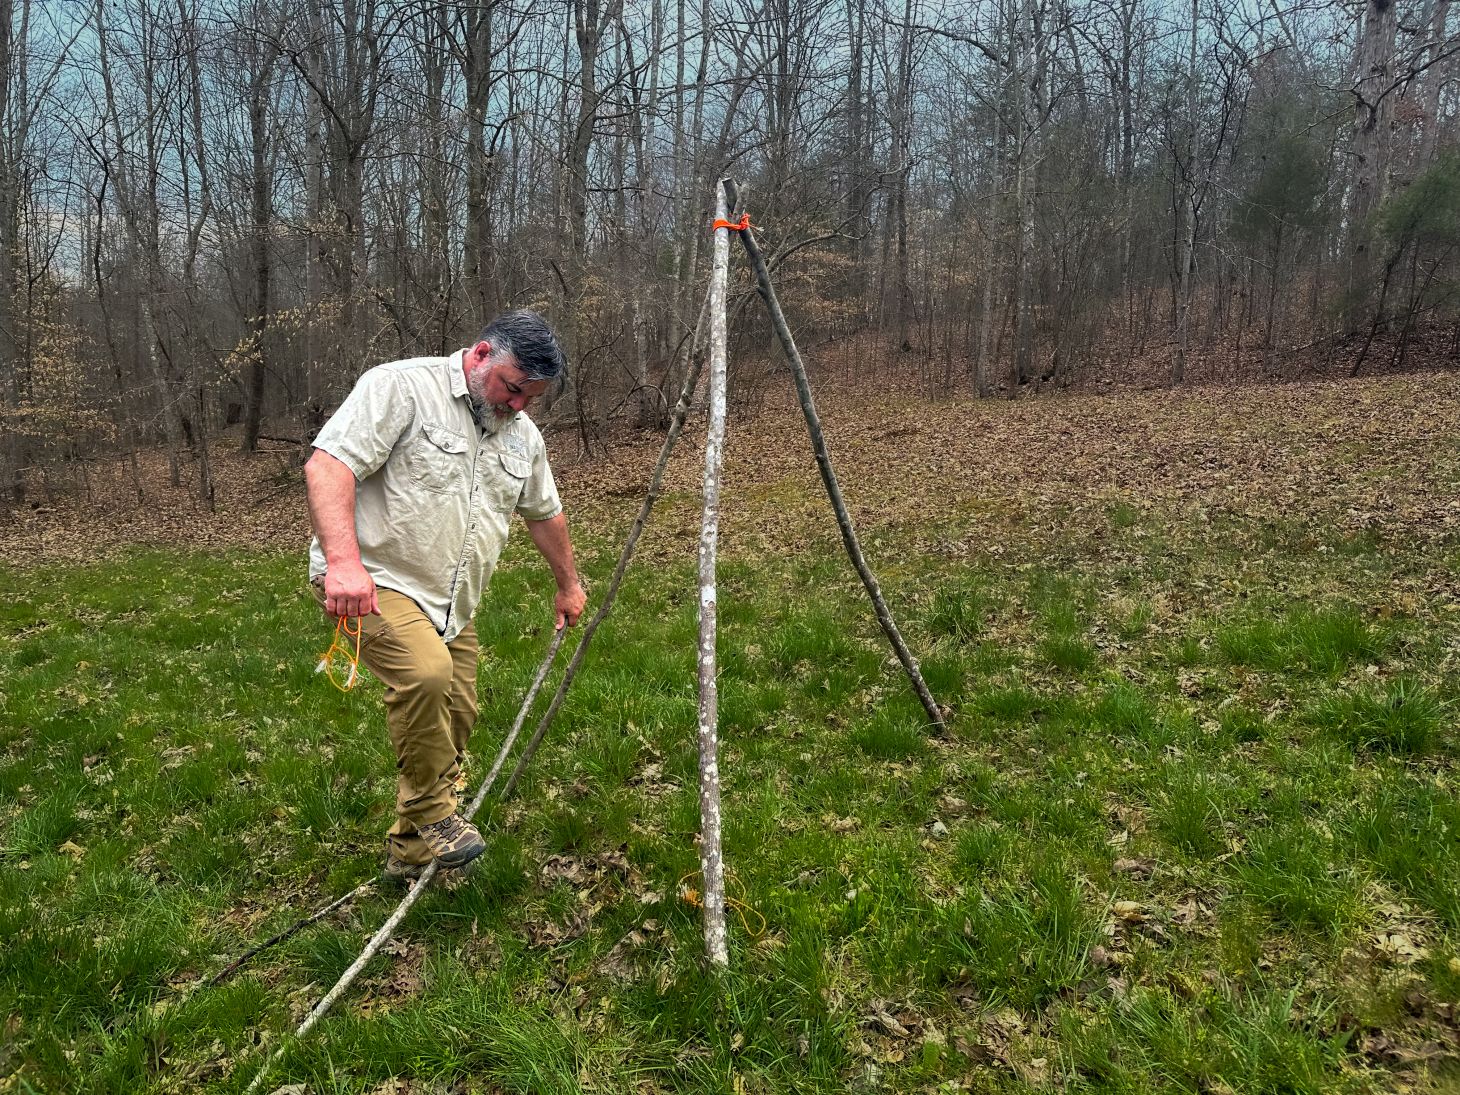
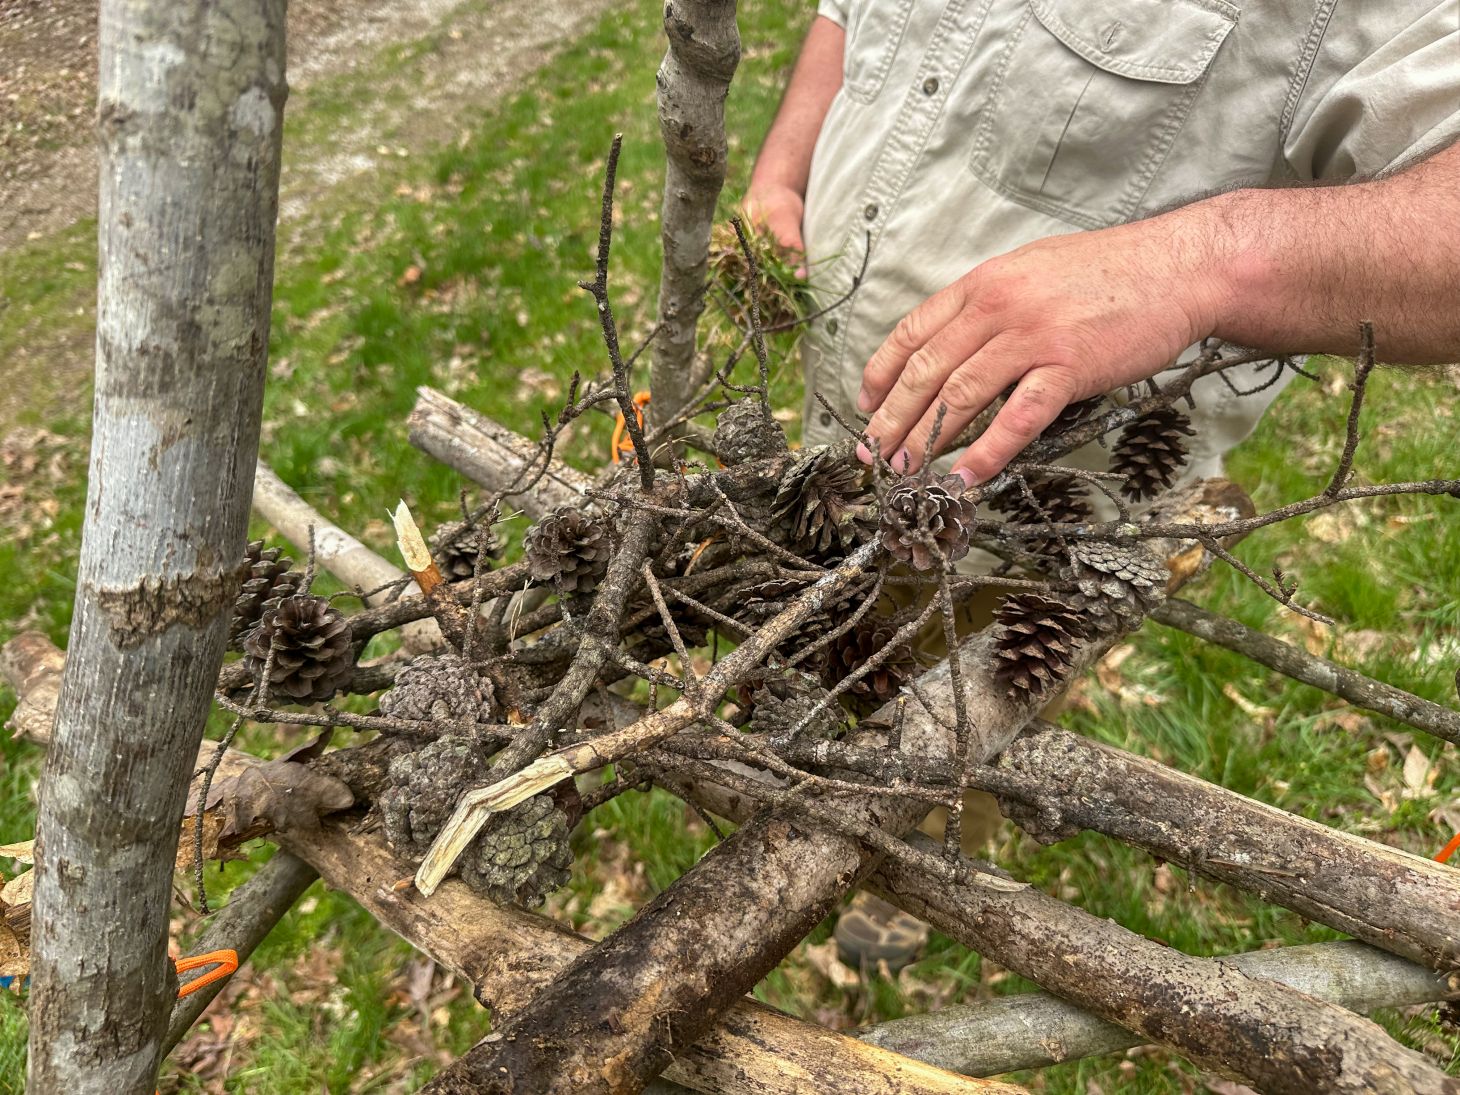
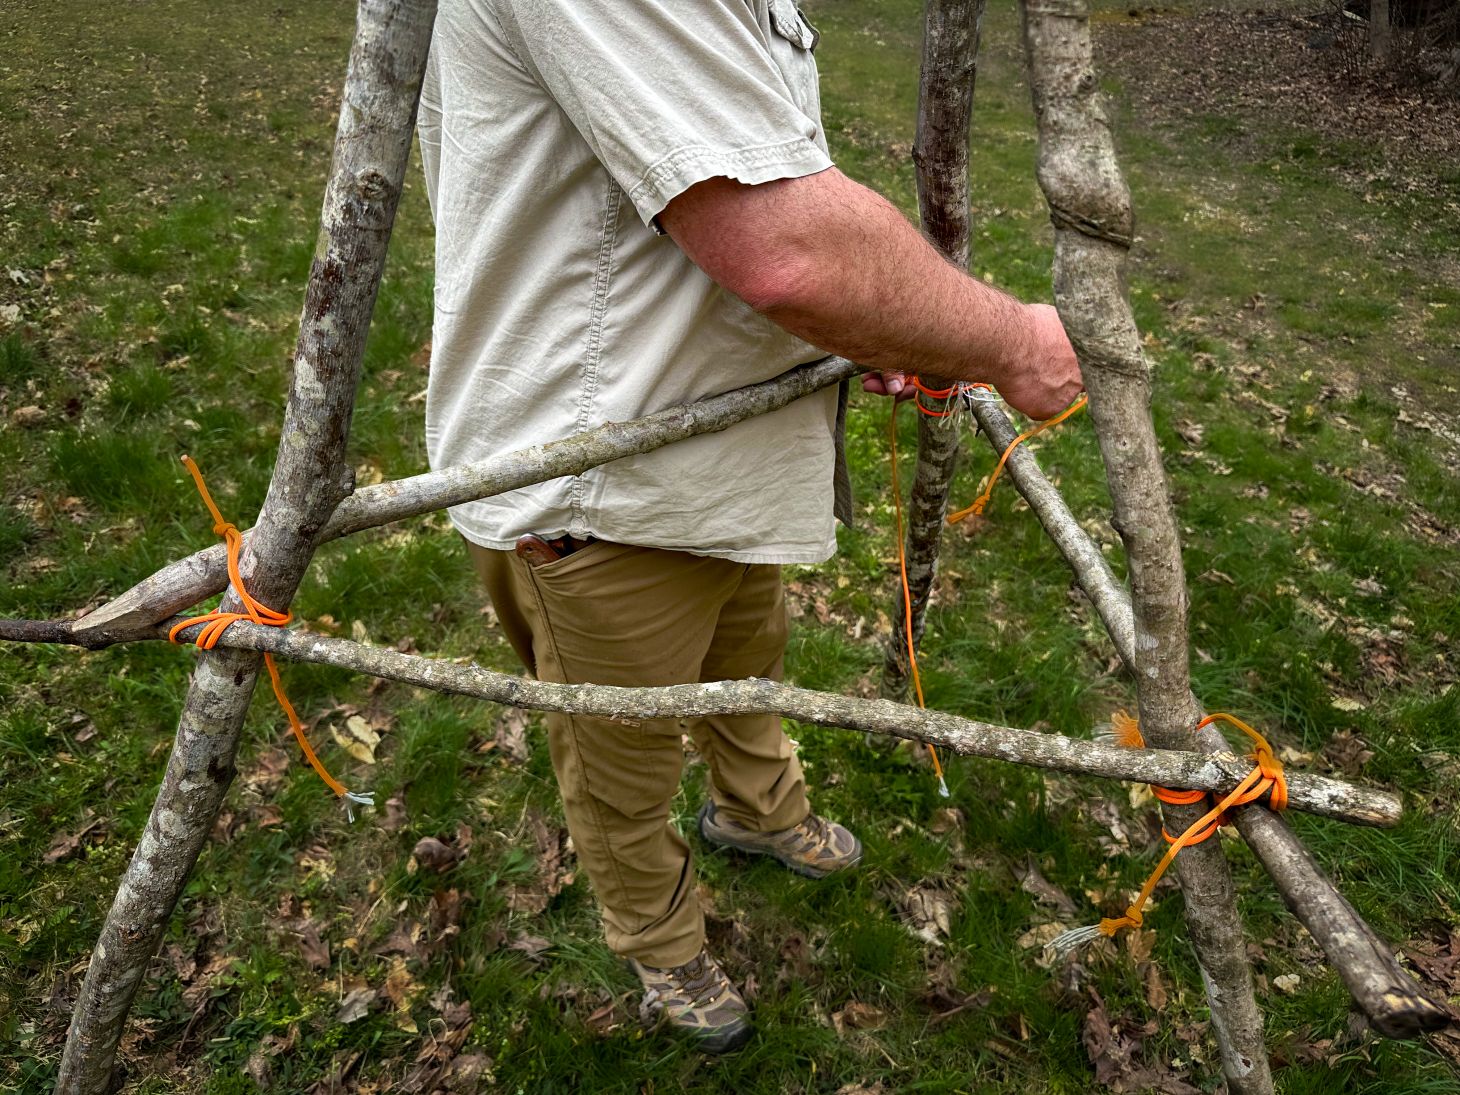
For signal fires I like to get them off the ground when it is possible. I create a tripod with a support table midway up the legs. Building the fire up this way will create more air circulation and smoke. Smoke is an excellent signal for searchers—both for their eyes and nose. I get this sort of setup built and ready to go, and when I feel or know searchers are in the vicinity, I will get it going. In addition, I will keep a fire on the ground nearby so there is a continuous signal at my position. If you build on the ground, use rocks, logs, or other debris to help keep the fire contained. Logs will eventually catch, but you can push them into the fire and get others for a boundary when needed. If the ground is wet or snow-covered, put a “fire raft”down to keep it from contacting the earth. (A fire raft is just several logs laid next to one another.) The earth is very good at conducting heat. So any fire built on the ground will go out quicker without some barrier between it and the earth. This also serves to allow oxygen channels under the fire to feed it.
Step 4: Arrange Your Materials on the tripod or ground.
Start by placing your tinder in the center of your cleared area. Then, build a small teepee around it with your kindling. This structure allows air to flow through, feeding oxygen to your fire. Leave an opening in the teepee facing the direction of the wind to help ignite the fire. Around this teepee, you’ll place your fuel wood, ready to add to the fire once it’s vital.
Step 5: Light the Fire
Light the tinder. Always carry a lighter in your pocket outdoors and a ferrocerium rod as a backup. Matches are okay, but lighter ones are more efficient and effective. Once the tinder catches fire, gently blow on it to spread the flames to the kindling. As the kindling burns, carefully add more and fuel wood to build up your fire. When starting and maintaining a fire, remember that fire needs three things to burn: fuel, ignition source, and oxygen. If you are having difficulty getting a fire going, take it back to the science of it in your mind. One of those three things are not right.
Step 6: Maintaining Your Signal Fire
Keep your fire going by regularly adding more fuel wood. Please pay attention to the direction of the smoke to ensure it’s rising where it can be seen. If the weather changes, you may need to adjust the location or structure of your fire to keep the smoke visible.
There are a few safety tips you can follow for any fire building in the outdoors:
-
Always have water or dirt nearby to extinguish the fire if it gets out of control.
-
Never leave your fire unattended.
-
Be mindful of local fire regulations and restrictions.
Final Thoughts
Building a signal fire is a critical survival skill that should be practiced and perfected. Following these steps can create a visible distress signal that significantly increases your chances of being found in an emergency. Remember, preparation and practice are essential. So, next time you’re in the great outdoors, take some time to practice building a signal fire. It’s a skill that could one day save your life.

THE 1871 CLUB