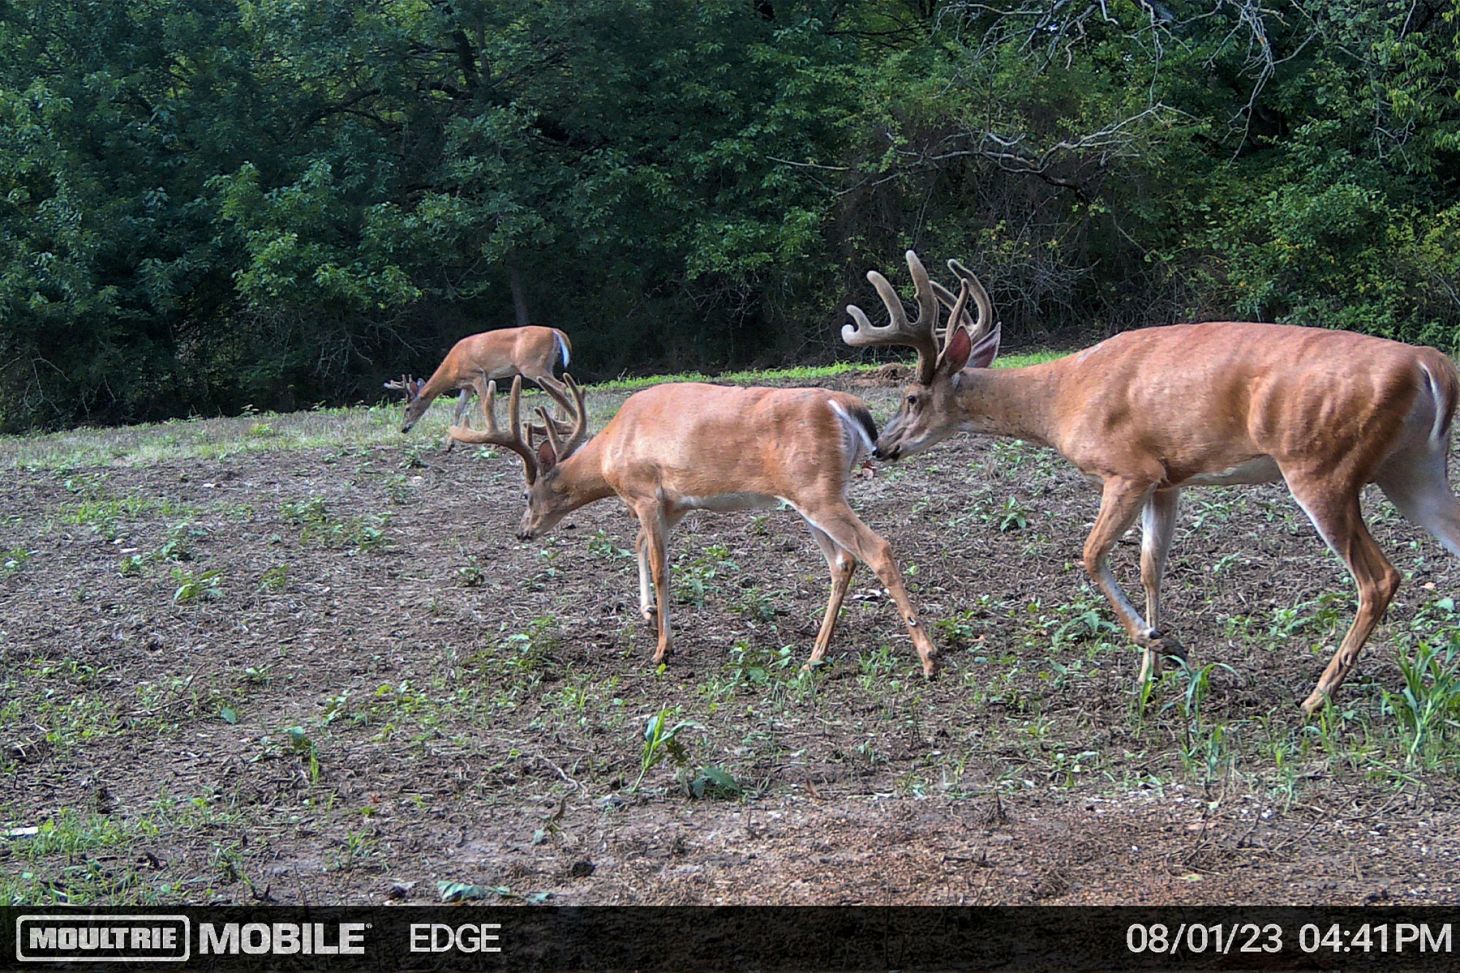
Getting good trail-camera photos of whitetail bucks isn’t all that hard these days. Cameras have improved a ton, and so has your average hunter’s ability to use them. As a result, we can take a fairly accurate inventory of deer on our properties before the season even starts. We can even assemble “hit lists” and “shoot/don’t-shoot” guides based on our trail-cam photos. And when we do succeed, the stories we tell these days usually come with a rundown of the buck’s full history, complete with trail-cam photo support.
So, yeah, we’ve gotten pretty good at using our trail cameras. But you can always get better, right? If getting more photos of higher quality with less effort and hassle sounds good to you, follow the 30 tips below to take your trail-cam game to the next level in the months leading up to the fall hunting season.
Top Trail-Cam Setup Tips
1. Make Bucks Pose for the Camera
Getting good photos of deer is a whole lot easier when you can get them to linger in front of your camera, and there are four great ways to do that.
Bait: Nothing will put deer in front of the lens like a pile of corn. Even if you don’t plan to hunt over bait, you may be able use it in the preseason to get an inventory of bucks. Obviously, you’ll need to check local regs, as bait is not legal everywhere, even out of season.
Minerals: If you can’t or don’t want to use bait, a mineral block or lick is highly attractive to bucks in summer and late fall. Put them at the edges of fields and food plots, point your cameras at them, and start counting bucks. (Again, check regs.)
Mock Scrapes: Neither bait nor minerals are legal in your state, even in the off-season? No problem. One of the absolute best ways to get bucks to pose trail cameras is by making mock scrapes. Dig up two or three big mock scrapes in areas you know bucks are present, and they will come, year-round.
Scent: When you have a camera set up on a hot trail and you just want to slow a buck down for a photo, hang a scent wick on a head-high branch or spray an attractant scent (where legal) right on the trail.
2. Match the Light
Do your best to mount your cameras in places with similar lighting as the spot where deer are most likely to appear. If your camera is in deep shade but will be shooting pics of deer in a well-lit field or food plot, for example, your subjects will likely be over-exposed and difficult to see well. Conversely, if the camera is in bright sun and shooting deer in the shade, the camera is likely to read the light incorrectly and produce poor photos.
3. Shun the Sun
Red Dog Outfitters owner Tim Clark is adamant about directional positioning of cameras. “Never face a camera directly east or west unless you’re willing to completely sacrifice morning (east-facing) or evening (west-facing) pics, at least in daylight,” he says. “Any time I can cheat a camera to the north side of a setup, I’m taking it. Nothing drives me crazier than getting a washed-out pic of a big-bodied deer, and I can’t get a look at the rack because the sun has blown out the pic.” Avoiding the sun will also reduce those blank shots, where the camera was simply triggered by heat. While you’re at it, clip and any branches, brush, or grasses that will move in the wind and cause false triggers.
4. Leave the Trees
Strapping cams to trees is Trail Cam 101. Trouble is, there isn’t always a tree where you want to hang a camera. Most models have a threaded mount on the underside, however, and there are lots of commercial rods made specifically for cameras that can be driven in the ground at any location. Being cheap, I had a welding buddy attach appropriately-sized bolts on metal rods I already had, for a fraction of the cost. I’ve also used camera tripods and fence posts for camera mounting, but my masterpiece was making a “tree” by gathering three stalks of standing corn together and wrapping the camera strap around them. No corn plants were harmed in the process, and I got some nice pics of a buck I’d have never gotten pics of from the tree line.
5. Get the Angle
When setting up on a trail in the woods, you’ll get more photos if you angle the camera so it’s quartering down the length of the path, as opposed to pointing directly perpendicular to it. (If you do the latter, a camera with a slower trigger speed might miss bucks scooching past.) You can also minimize the risk of bucks being spooked by the cam by considering the main flow of traffic on a trail (say, an entry trail to a food plot) and angling it so deer will be facing away from the camera when it triggers.
6. Switch Up the Settings
A lot of hunters use the same camera settings with every setup, but there are big advantages to adjusting the trigger speed, sensitivity, flash range, image quality, trigger delay, and more (depending on you camera’s adjustability) to suit specific situations. At a bait or mineral site where deer are coming in droves, for example, you can back off the trigger speed and sensitivity and increase the delay to save battery life and so you aren’t overwhelmed with too many photos. The opposite is true on a deer trail where you’re hoping to catch a rutting buck cruising past; here, you want the fastest trigger, the highest sensitivity, and a burst of photos so you don’t miss anything.
7. Save Cell Cams for Sensitive Areas
More and more hunters are switching to cellular trail cams every year, but most of us still have a bunch of conventional cams in our arsenal. So, save your cell cams for the most sensitive setups, such as a deep-woods scrape line, a small kill plot smack in a buck’s core area, or any trail or sign near buck or doe bedding areas. Use your conventional cams at spots that are easy to check with minimal intrusion, like field edges and staging-area buck sign.
Top Trail-Camera Maintenance Tips
8. Charge Up With Lithium
Yes, inflation is still with is, but this is no time to start skimping on trail-cam batteries. It’s true that you can save a few dollars up front by buying cheapie alkaline batteries, but trust me, it’s not worth it in the long run. Cough up a bit extra for lithium batteries, like Energizer Ultimate Lithium, which will simply last longer and power your cameras better and more efficiently. Save the cheap stuff for your kid’s most annoying toys!
9. Buff Up Your Battery Contacts
If your cams are more than a year old, they’ve spent some time in the weather, enduring heat, cold, moisture, etc. All that exposure can oxidize the battery contacts and result in a poor connection that will compromise camera performance. Before I deploy my veteran cameras for another season, I use a small section of Scotch-Brite pad and lightly buff the battery contacts inside each cam.
10. Keep the Bugs Out
If you’ve never had ants colonize your camera, you’re missing one of Nature’s great wonders. How these tiny critters can infiltrate nearly water-tight seals, crawl into every crevice by the scores and lay eggs in places that defy description is truly impressive. Unfortunately, this invasion can also fry your circuit board and render a marvelous piece of technology basically worthless. You can prevent this, however, by simply adding a dryer sheet to the inside of your camera. If space is tight, you don’t need the whole sheet, just trim a small section off with a scissor and cram it in a corner. The smellier the sheet the better (I prefer “Bounce Outdoor Fresh” for its heady bouquet) and, if you’re worried about deer spooking from the scent, dont. I have plenty of pics of nanny does sticking their nose right up to a lens, apparently inhaling the odors from my dryer sheet.
11. Wipe Your Camera’s Eyes
If you’re an eyeglass wearer, you likely clean your lenses at least once, if not several times, each day. Nothing is more irritating than trying to see through streaks, smears, and water spots, right? Well, it only makes sense to treat your trail-cam lens similarly. After all, it’s out there getting hammered by rain and blasted by dust on a 24/7 basis. I not only give my cam lenses—and sensors and flash unit”“a thorough wipe-down at the beginning of season, but I carry lens wipes with me as I make visits to check my cameras. Clean cams are not only more sensitive, they simply take better pics.
12. Use Desiccant to Fight the Dew
Moisture can also compromise camera performance, and while the seal on most cams will keep out dew and driving rain, some locations (or cameras) just seem more prone to moisture problems. Fight this by slipping in a desiccant pack into your camera. (You can tape it to the door if you don’t want it rattling around in there). These packets can absorb up to 40 percent of their weight in moisture and help keep your camera humming along nicely in damp conditions.
13. Stock Up on SD Cards
The folks in the electronics department at my local superstore know me well. Every time I swing through, I ask them to unlock the SD card rack so I can buy a couple more. I don’t have an accurate count, but I easily have three times as many cards as I do cameras. Not only does having an arsenal of SD cards allow me to swap them out frequently on my visits, but I’ve learned the hard way that some cameras simply don’t like certain cards. I’m not enough of an electronics geek to explain this; all I know is that if I get an error message when I power up a camera, usually the quick, easy fix is to feed it another card. That’s a far better solution than taking the camera home, calling customer support, and having them troubleshoot—until they tell me to “try inserting a different SD card.” Oh and, weirdness alert: The same card rejected by one camera will often work just fine in another.
14. Get the Update
Virtually every trail-cam maker offers firmware updates for individual models; these are improvements that help your camera run better, either by solving a previous glitch or just finding a way to help the cam perform at a higher lever. You should download/run these as often as they become available. If you’re a wireless cam user, you’ll likely get notified of updates through the camera’s app. If you have a conventional cam, just check your main menu when you’re swapping out SD cards or changing batteries. Your camera will run better and you’ll likely enjoy nicer pics.
15. Formatting Matters
Another menu choice on your camera will be whether you want to “format” your SD card. While I used to ignore this option, I don’t any more. SD cards, especially if they’ve been in another camera, but sometimes even when they’re new, can confuse a camera and cause trouble unless they’re properly formatted for that specific model. It important to understand that formatting deletes all the pics currently stored on the card, but you’ve likely downloaded them all by the time your replacing the card. So, it shouldn’t be an issue. I’ve had almost zero difficulty with cameras running an SD card card when I take a few seconds to format it.
Advanced Trail-Cam Hacks
16. Have a Cam Calendar
On any property, there are a handful of hotspots that have good deer traffic year-round, where you can put a camera up and pretty much leave it there forever. But there are a lot more spots that go hot and cold, and moving some cameras around based on the season can help you catch the best action. Here’s my basic cam calendar.
Late Summer and Early Season: With unpressured deer that are totally focused on food, the edges of fields and food plots are top spots, of course, as are water sources if it’s dry. Also look for the absolute easiest-walking paths leading to and from food. This time of year, even the oldest buck will walk right down the middle of a tractor path or logging road.
Prerut: Save a few cameras to catch those bucks making the first pop-up rubs and scrapes in staging areas and the edges of oak flats.
Rut: Put cameras on macro funnels leading to and from other properties to catch big-running deer, as well as on travel corridors near doe bedding and on doe feeding areas.
Late Season: It’s all about the food again, but you need to take extra care. The best bet can be to back your camera off the entry trails of major food sources and put it in time-lapse mode.
17. Spit On a Stick (Gross, Yes, But It Works)
In a world where mineral licks and bait piles are increasingly taboo, trail-cam users have to get creative, and I can always count on my friend and whitetail expert Ted Marum to do just that. One of Ted’s favorite tricks is to simply jam a stick in a logging road, or at the junction of several deer trails, and train a camera on it. Before he walks off, Ted spits on his palm, and rubs it up and down the stick. “Every buck that walks down that road or trail is gonna stop and smell that stick,” he says. “I’ve got tons of pics of them not only sniffing that stick, but licking it themselves and returning to do so whenever they’re on that trail.”
18. Make Your Cam Visits More Predictable
While it’s generally a good idea to keep conventional cams away from sensitive spots like bedding areas, it’s not always possible, especially when bucks are bedding close to food sources (common in the summer). The trick here is to drive as close as possible with your truck or ATV at the same time midday, on a regular schedule. These predictable visits condition bucks to your presence and quickly become routine for them, especially in farm country where vehicles are a normal part of everyday life for deer. Red Dog Outfitters’ Tim Clark takes things a step further, as he can use bait and other attractants at his summer sites. “I study the pics, and any time I see a buck that hits the site following my visit, I know he’s associating them with something positive,” he says. “So I make it a point to come at exactly the same time and frequency and keep him happy in that area.”
19. Set Cams to Photo Plus Video for the Whole Picture
Even though it uses more battery, I always set my cameras, cell or conventional, to photo plus video. I want both. If I get a good photo, that’s easier to store than vid. But photos often don’t show you the complete picture. The cam might trip on a doe and during the delay not get the giant buck just behind her. When I get a thumbnail from my cell cam, I always request the video. In fact, I did it just the other day and watch video of a couple of does milling around—that is, until the last 4 second of the clip, when a 190-inch whitetail stepped into the frame.
20. Don’t Forget the Specs
When you’ve got a dozen or more trail cameras of mixed brands and models, it’s easy to forget each one’s specs. (Some cameras show you some specs in the setup menu, but ohters don’t). This is really important information to know, however, when setting up your cams. If you’re setting up on a trail during the rut, for example, you want a cam with the fastest trigger speed. Or, when setting up in an open area with spooky deer, you want long flash and detection ranges. So, when you get a new cam, use a permanent marker to jot down a shorthand version of the key specs so you’ll always have it handy.
21. Hang ‘Em High
Many deer, including some old, massive bucks, are pretty mellow around trail cameras, but let’s face it; we’ve all had those one-and-done bucks who freaked out when a flash (even an IR) went off. This typically happens at a site where deer linger (a mineral lick, bait pile, or mock scrape), since the flash isn’t a one-time event, and the continued exposure finally makes the deer goosey. You can largely eliminate this by hanging your cameras higher—6 feet or more—and pointing them down at the focus spot (which you can accomplish by simply leaving a little slack in the camera’s strap and jamming a stick behind it). While the buck may still see the flash, it’s definitely not as bothersome.
22. Go to the Ground
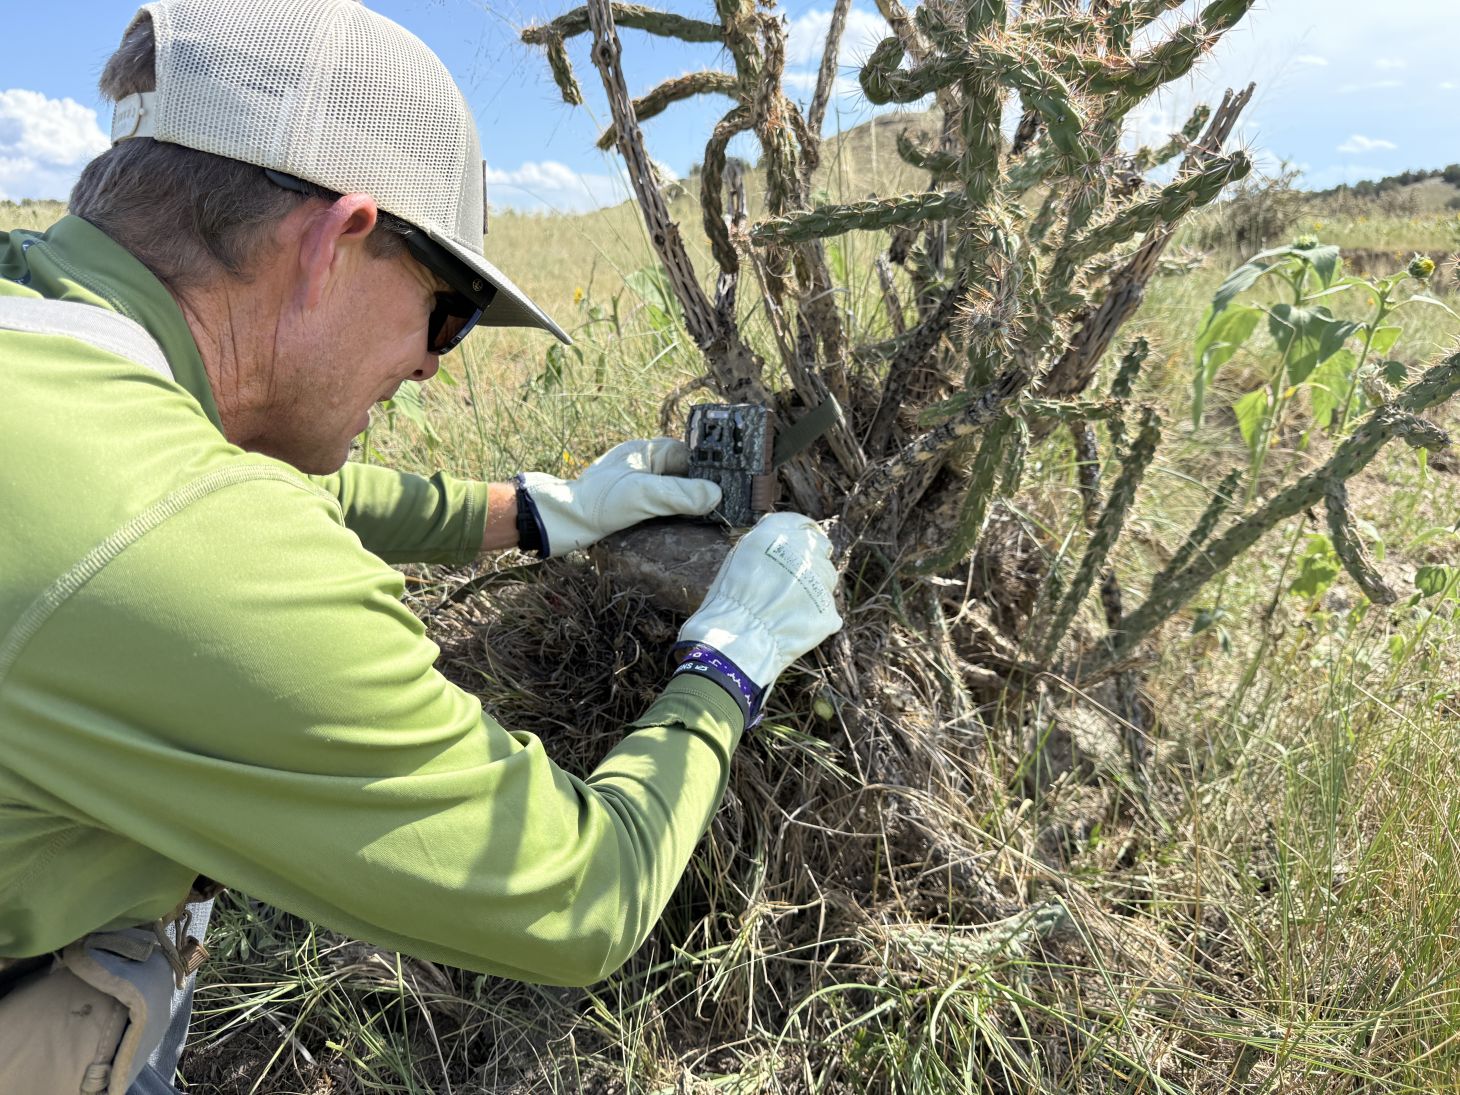
Another option for keeping your cameras better hidden from both game critters and would-be thieves is one most people never think of, which is to go low instead of high. I often put my camera right on the ground. I’ll dig a little cavity in the dirt, place the camera—usually pointed a little upward but sometimes pointed downward from a steep slope or ledge—and then hide it almost completely from view with rocks or logs.
23. Use Magic Vines
Mock scrapes are some of my favorite cam sites, and I make a lot of them. But sometimes I simply don’t have the time to create a complete scrape, or I might want to check the edges of a soybean or alfalfa field but not want to damage plants by creating a scrape. The quick and easy fix here is to simply zip-tie a chunk of grape vine (lacking a vine, a chunk of frayed rope will do) to a branch that overhangs the field edge. While there might be several existing branches, the bucks will spend more time at my viney one than all the others. I don’t know what magical elixir grows within a vine, but bucks absolutely love it. Hang your cam pointing at the vine, and you’ll get the best bucks in the neighborhood. And hey, if they start a scrape there and wreck some hay or beans, it’s the buck’s fault, not yours.
24. Cut the Corners
Deer love to enter fields and food plots at the corners, and they’ll often have a favorite corner in a given field. As a result, it’s pretty standard for hunters to find the heaviest entry trail on a favorite corner and point a camera at it. That’s fine. But how you point it can make a big difference. On any hot corner, deer are apt to have multiple points of entry, and while does and small bucks may be pounding the heaviest trail, mature bucks may skirt it. So, go ahead and point your camera at the main trail, but choose a unit with a long detection range and back it off or angle it so that the entire field corner is also in view. That way, you’ll get all the traffic on the main trail—and the other deer skirting too.
25. Make a Cam Kit
Most anyone who knows me well can attest to my disorganized nature, and I spent a long time cussing myself when I forgot the tools needed to do a good job running trail cams. I overcame all that by assembling a trail-cam kit that goes in my truck at the start of the summer and never leaves. I stuff a plastic tote with extra batteries, SD cards, zip ties, deer scent, clippers, a zip-loc baggie with dryer sheets, and as many prepped-and-ready fresh cameras as I can fit. Now when I visit my cams, I’m ready to replace or tend to existing cams, as well as slap up a new unit in a spot where I’ve spotted a good buck.
26. Keep a Digital Cam Journal
Some of the savviest deer hunters keep a written journal to record in-field observations, which they later use to uncover annual patterns, like bucks hitting certain areas at roughly the same time year after year. Well, you should to the same with your trail-cam photos.
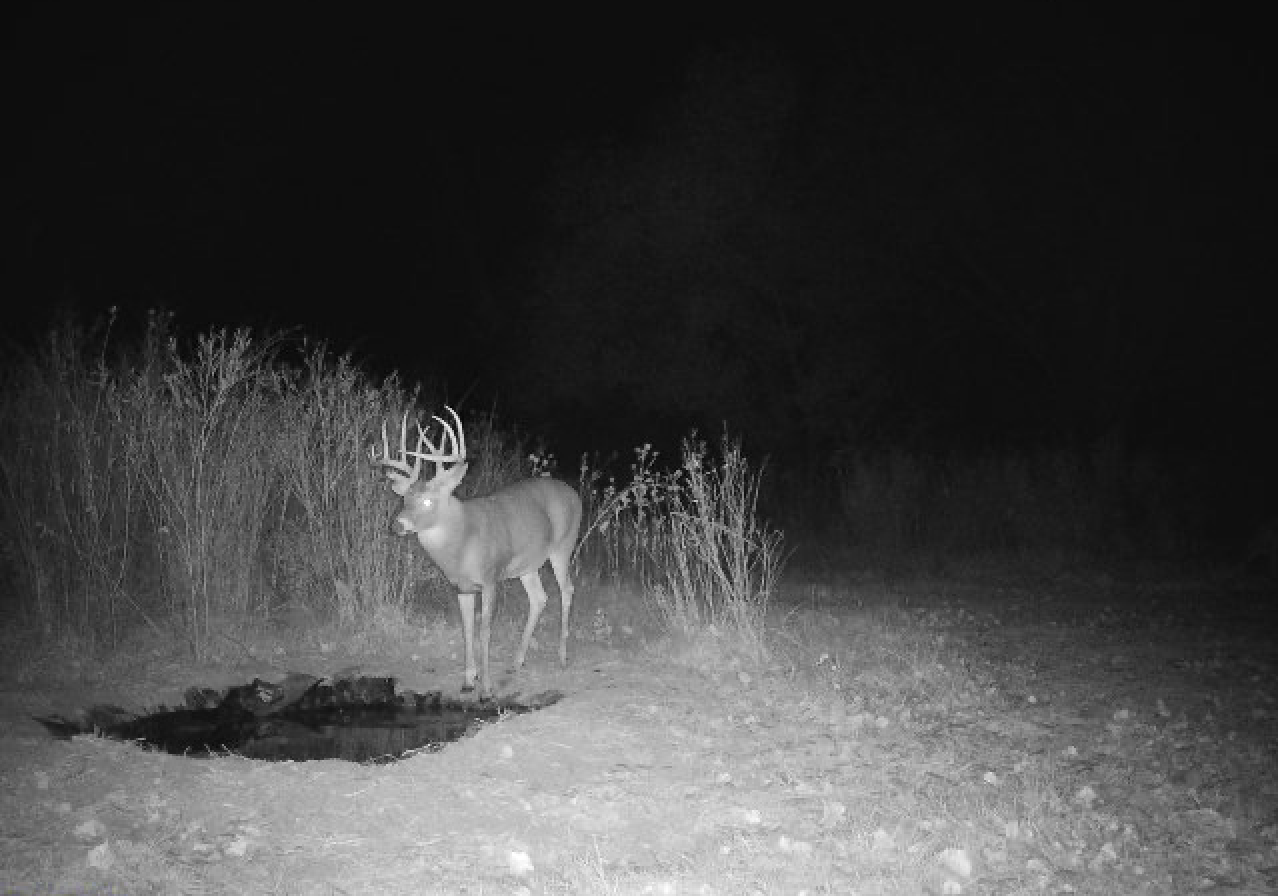
In 2022, I started getting pictures of a great buck I named “Too Tall” that year after year would hit one of my push-up ponds in late October and then would daylight a few days later. In 2024, he appeared for the first time on the water on October 19, and I arrowed him on October 24. But I would have never figured out his annual pattern if I hadn’t kept the proof of it by keeping and organizing my old photos.
27. Run a Noise Test
Some cameras have a noisy shutter, especially as they get older. To test this, set your cams up in the backyard before deploying them, and walk past them so you can hear the shutter. After a while, you’ll get a good sense of which of your cams are quieter and which are noisier. Then deploy them accordingly. In tight woodsy setups where deer are apt to be close to the cam, go with the quieter ones. Save your noisier cams for farther-off field setups—and remember which brands and models are quietest reference for when you’re buying new ones.
28. Become a Battery Miser
It’s no secret that battery prices—especially for my favorite lithiums—have soared of late, and if you run multiple cameras like I do, your battery bill is at an all time high. Here are some ways to put some salve on the sting:
Tweak your frequency: We mentioned this earlier, but it’s worth repeating: If your camera is set on a spot where deer linger (mineral lick, bait pile, etc), you can save a ton of battery life by lengthening the interval between pics. You don’t need 50 pics of the same doe, do you?
Space out your transmissions: Wireless cams want to send you pics as soon as they take them, but every transmission eats battery life. Get on your app and tell the camera one or two batches of pics per day is enough.
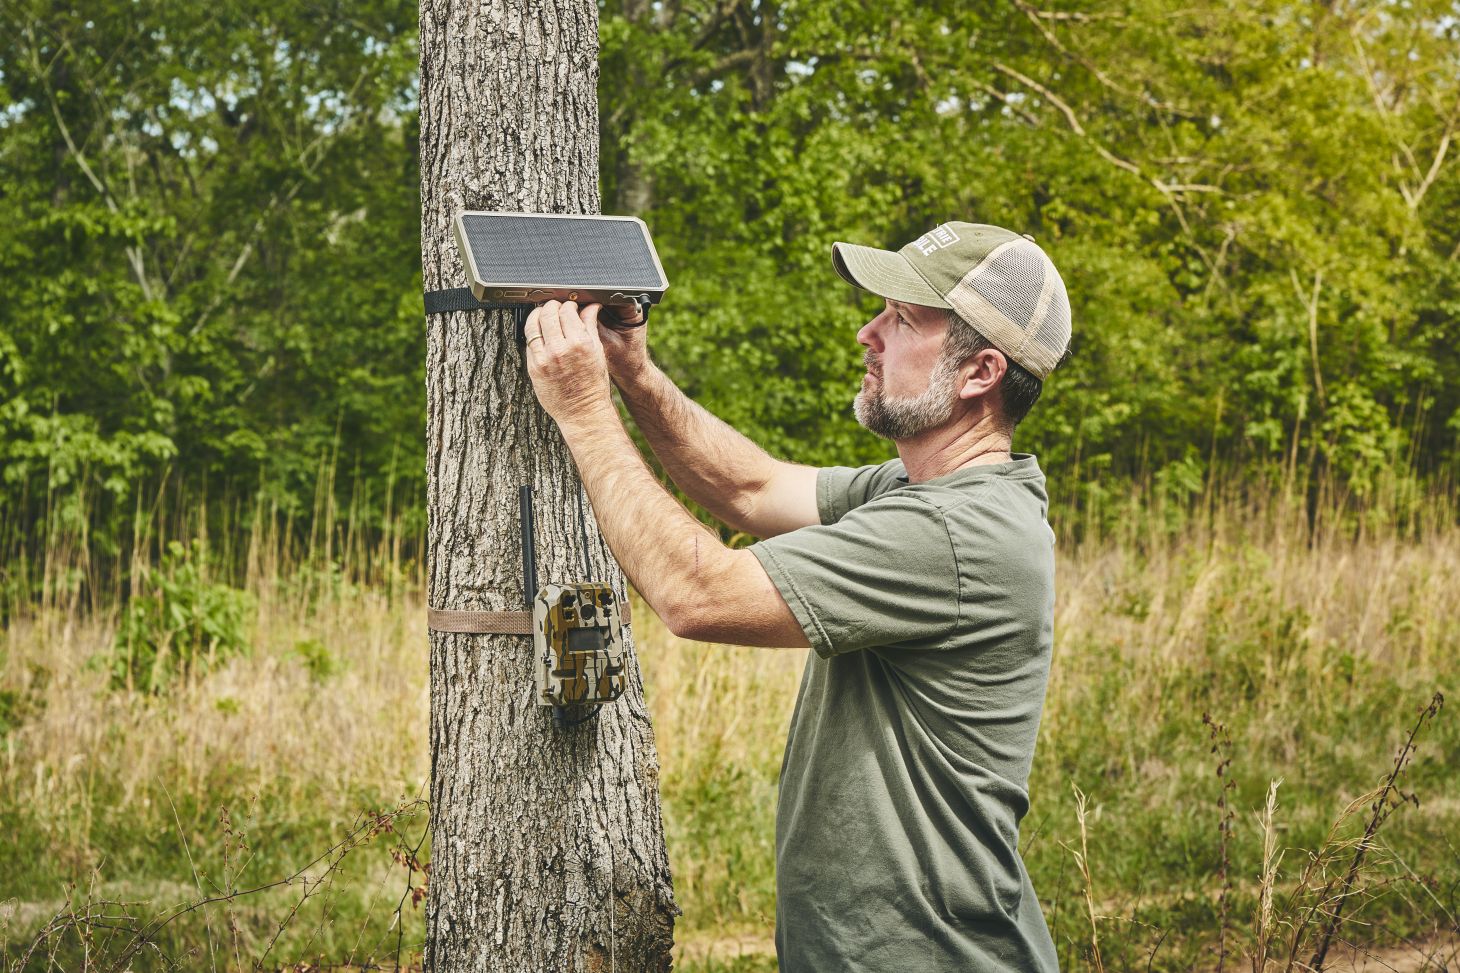
Go external: Several companies make external power sources for their cameras (solar and 12 volt) and while these require an additional investment beyond the purchase price of the camera, they can save you a pile of money you’d have spent on batteries in the long run.
29. Don’t Give Up
When you stop getting trail-cam photos of a certain buck, it’s human nature to assume he’s not around anymore. You might even be tempted to stop hunting the area because your phone has stopped dinging with pics of the deer. But it’s much more likely that the buck is still in the area but just not walking right in front of your camera anymore. It’s not at all unusual for bucks to eventually start skirting a trail camera, so before you give up, just pull the camera back a little to get a wider view or move it up the trail ahead of the spot he’d learned to avoid. There’s a good chance your phone will start dinging again.
30. Hang a Dummy Cam
You will definitely get more picture of bigger bucks if you cameras don’t get stolen. Guaranteed. I’ve had four cameras swiped in the last few years, and three of them have been lifted from the same 80-acre farm I hunt. After talking to a couple veteran trail-cam buffs, I came up with a plan to catch my thief—which might work for you too.
First I’m going to hang an old dud camera I don’t care about in a fairly obvious place that should be easy for my robber to spot. I’ll likely make a big mock scrape by the cam to help catch his attention. Then, about 15 yards away, I’m going to use three screw in tree steps to help me get 10-12 feet up a nearby tree and hang a wireless camera there. When the thief nabs my dummy cam, the real one will snap his pic and send it to my phone. Then I’ll call my local warden and if he’s available, send him to the spot to get the guy. If he’s busy elsewhere, I’ll still have a pic of the thief and should be closer to nabbing him.

THE 1871 CLUB