Accuracy vs Precision: Do You Know the Difference?One is about hitting your mark, while the other is about shooting tiny groups—and every serious shooter wants both at the same timeByRichard MannJul 18, 2025Read Story
HuntingColorado Reconsiders Wolf-Release Protocol After Several Transplanted Wolves DieBySage MarshallJul 16, 2025
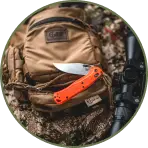
HuntingWe Love Kershaw Knives—And They're On Sale for Prime Day As Low As $14ByAmanda OliverJul 10, 2025