_We may earn revenue from the products available on this page and participate in affiliate programs. Learn more ›
_
See if this sounds familiar: You take your new trail camera out of its packaging, set it up to the manufacturer’s specifications, and place it at a likely spot. Then days later, you return and check the card hoping to see a bunch of great deer photos, but instead have a bunch of foraging squirrels, waving branches, or supernova sunlight. If that’s happening, you probably need a refresher on how to set up a trail camera to get the pictures you’re actually after.
These gaffes don’t mean that today’s best trail cameras
are difficult to master. They’re not. But even the simplest aspects of setting up and using trail cams hold some challenges that beginners must understand. Just ask Art Helin
, a hunter, photographer, land manager, and trail-camera expert from Dodgeville, Wisconsin. He’s used cameras for decades to capture images of deer
, turkeys
, and other critters
, and he’s learned some useful tricks during that time on how to set up a trail camera for the best results.
Find the Best Trail Camera For You
Many prospective trail-cam buyers face a dilemma before considering how to set up a trail camera. In a market filled with choices, from low-end price-point models to ultra-high-tech choices, which game camera should they buy? Helin takes a utilitarian approach.
“I think the biggest thing today is everyone has gone megapixel crazy,” he said. “I’m not blowing up a picture of a deer to put on a poster in my office. I want to know what it has for antlers. They need to put the megapixel stuff aside and look at functionality.”
Helin prefers cameras that can be set to take two- or three-image bursts, and models that offer easy setup with a simple on-off switch. “It seems like the more basic they are, the better they run,” he said. “It doesn’t have to have a lot of megapixels, and it doesn’t have to have video. That’s something down the road for people after they get used to them.”
have become increasingly popular recently, and Helin uses them frequently. However, he recommends that beginners choose units that use SD cards. And he said you don’t need to go crazy with the size of those cards. “If I’m running video, I’ll run 16s or 32s,” he said. “You can run an 8-gigabyte card and take 14- to 22-megapixel pictures, and you’re going to get 3,000 to 4,000 images on there.”
He purchases two SD cards for every camera, which makes it much easier to change cards in the field. And Helin never switches cards between different brands of cameras, as that can make cards lock up or otherwise become inoperable.
Helin also offered a final caveat on purchasing trail cameras: Don’t view them as long-term investments. “People buy these and think they’re going to spend under $100 on a camera and get five to 10 years out of it, and that’s not realistic,” he said. “They’re electronics. If I took you out in the woods tomorrow and told you to stay there from sunup to sundown and endure the heat, humidity, cold, wind, rain and all that, how long are you going to last?”
**Read Next: 13 Tips for Taking Better Trail Camera Photos
**
Most cameras left in the field constantly last about two to three years, Helin said. Cameras that are stored seasonally—during winter, for example—with the batteries removed so they don’t corrode might last three to five years. That seems brief, but Helin said it’s reasonable when you prorate the initial investment over the camera’s life.
“People say, ‘I spent $150 and left it out 24/7 and got three years out of it,’” he said. “That cost you how much per day to leave that out there? It costs you way more than that to get a cup of coffee every day.”
Before You Set Up a Trail Camera
With new cameras in hand, many folks rush to program the device and set it up. Helin takes a slower, more methodical approach. First, he eliminates human odors from the camera—a critical consideration when trying to get images of whitetail deer or other critters with sensitive noses.
“People used to say flash cameras were bad,” he said. “Then they came out with infrared models, and they said deer see that infrared, and the trigger scares them. The biggest problem isn’t the flash or infrared. It’s your scent. If it’s a flash that scares your deer, then every time we have a thunderstorm or lightning starts flashing, you’d better run to your basement or storm cellar, because you’re going to have deer running through your windows.”
Before setting a trail camera, Helin removes it from the packaging, hoses it down with water or washes it with a field wipe, and lets it sit outside for a week to eliminate odor. Then, while wearing vinyl gloves, he’ll program the unit and prepare to mount it. Then he cleans the device again with field wipes to rid it of perspiration and other odors.
How to Set Up a Trail Camera in 3 Simple Steps
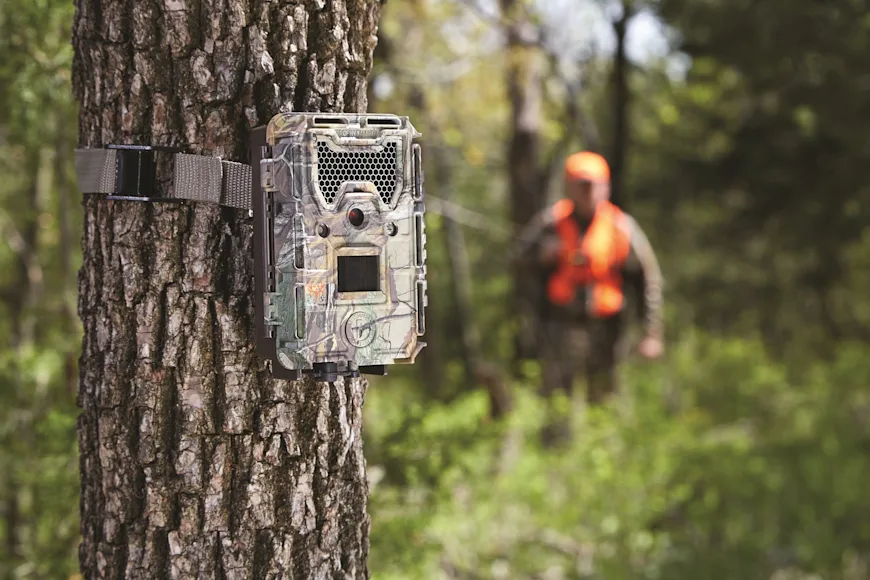
1. Pick the Tree of Post to Hang the Camera On
When placing cameras, Helin seeks areas that don’t require him to walk far or spend too much time in the woods, ideally taking a utility vehicle almost to the location. That limits his disturbance and scent at the spot. He looks for trees, fence posts, or similar objects to which he can affix the trail cameras with a strap. He eschews screw-in-type mounts, as those can harm timber. He’ll also use stake-type ground mounts in open areas.
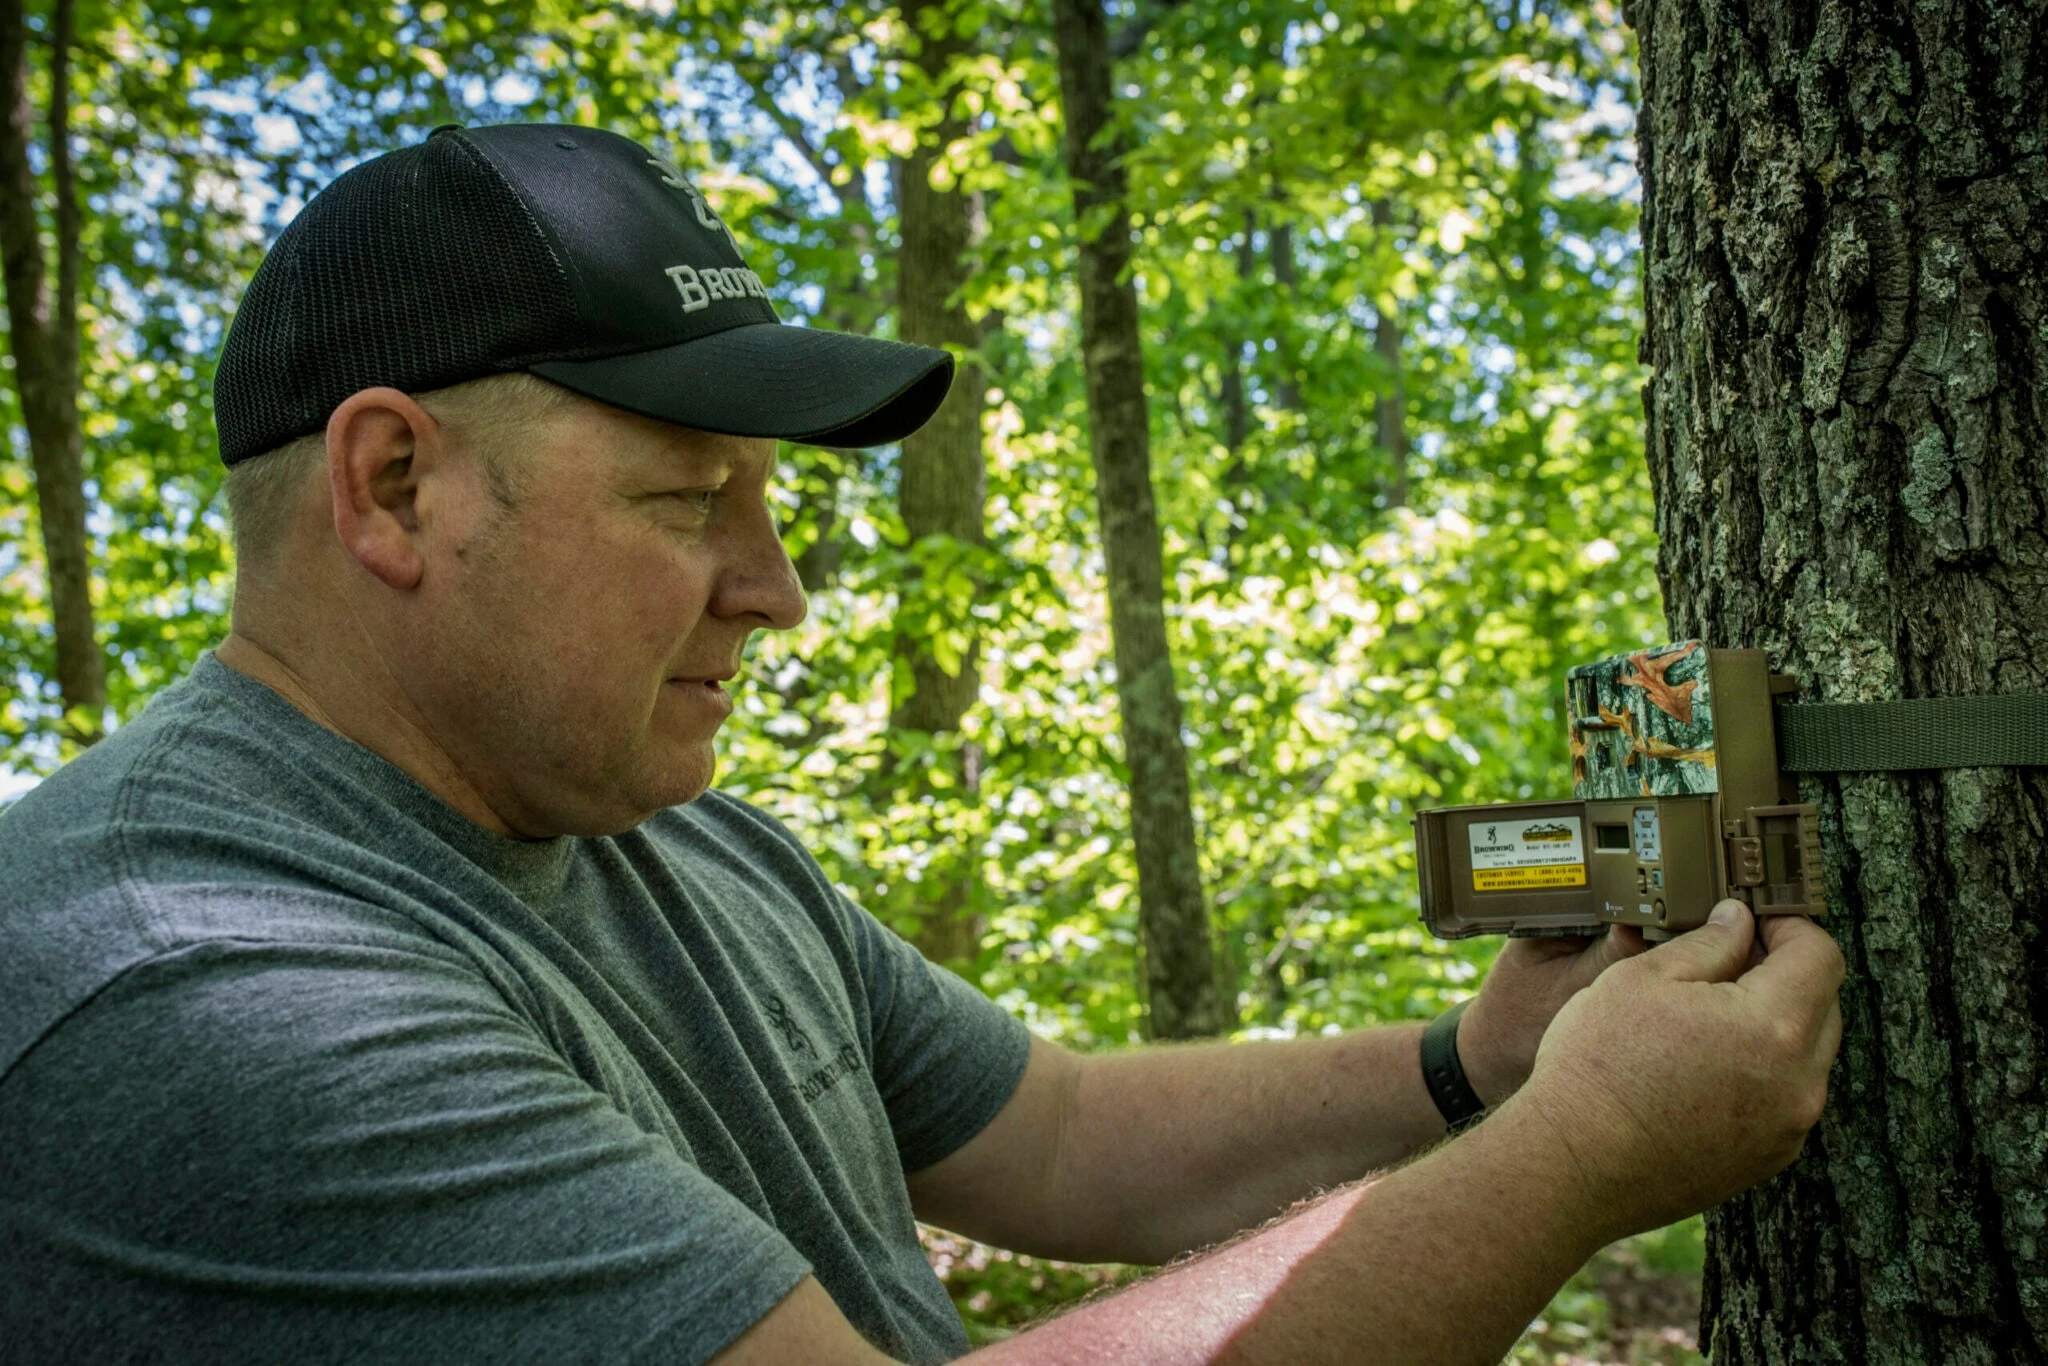
Check SD cards while you’re in the field so you can adjust a camera if necessary. Browning Trail Cameras
2. Face the Camera in the Right Direction
Common sense often dictates the direction of a camera. It’s best not to face them directly east or west—into the rising or setting sun—as that can result in obscured or whited-out images. Helin typically sets his cameras about 4 feet high, which is slightly higher than some manufacturers recommend. (Some deer hunters set units at 6 or 6 1/2 feet and face them downward, but Helin said that angle can result in images that misrepresent the size of an animal.) Then, he makes sure the camera is at the correct angle to capture images. If it needs to be adjusted, he’ll clip some branches or brush and wedge them behind the unit to correct the angle.
3. Trouble Shoot Your Trail Camera Set Up
Helin then troubleshoots the area around the camera, looking for brush or low-hanging branches within about 15 feet of the unit. Those objects can trigger the device when they move in the wind, especially if the camera is programmed at a high sensitivity setting. (Generally, it’s best to set the sensitivity high for open areas but lower for brushy or grassy spots.) “Otherwise, you’re going to be pretty upset when you have 2,000 images of a branch blowing in front of the camera,” Helin said.
**Read Next: Is it Cheating to Use a Wireless Trail Camera?
**
After You’ve Set Up the Trail Camera
Helin said many people check trail cameras too often, which creates more disturbance and leaves more scent in the area—again, an important consideration with whitetails. During much of the off-season, he checks his units about every three weeks, often when he’s at his property mowing trails, spraying food plots or performing other tasks. “I just put a big enough SD card in them,” he said. “Those pictures aren’t going anywhere.”
When to Check Your Game Camera
After bucks have put on most of their annual antler growth—early August, in Helin’s neck of the woods—he’ll actually check them less frequently and usually during rainy days to reduce scent. He changes SD cards as needed, but that depends on how active a spot is and how many images the card has stored.
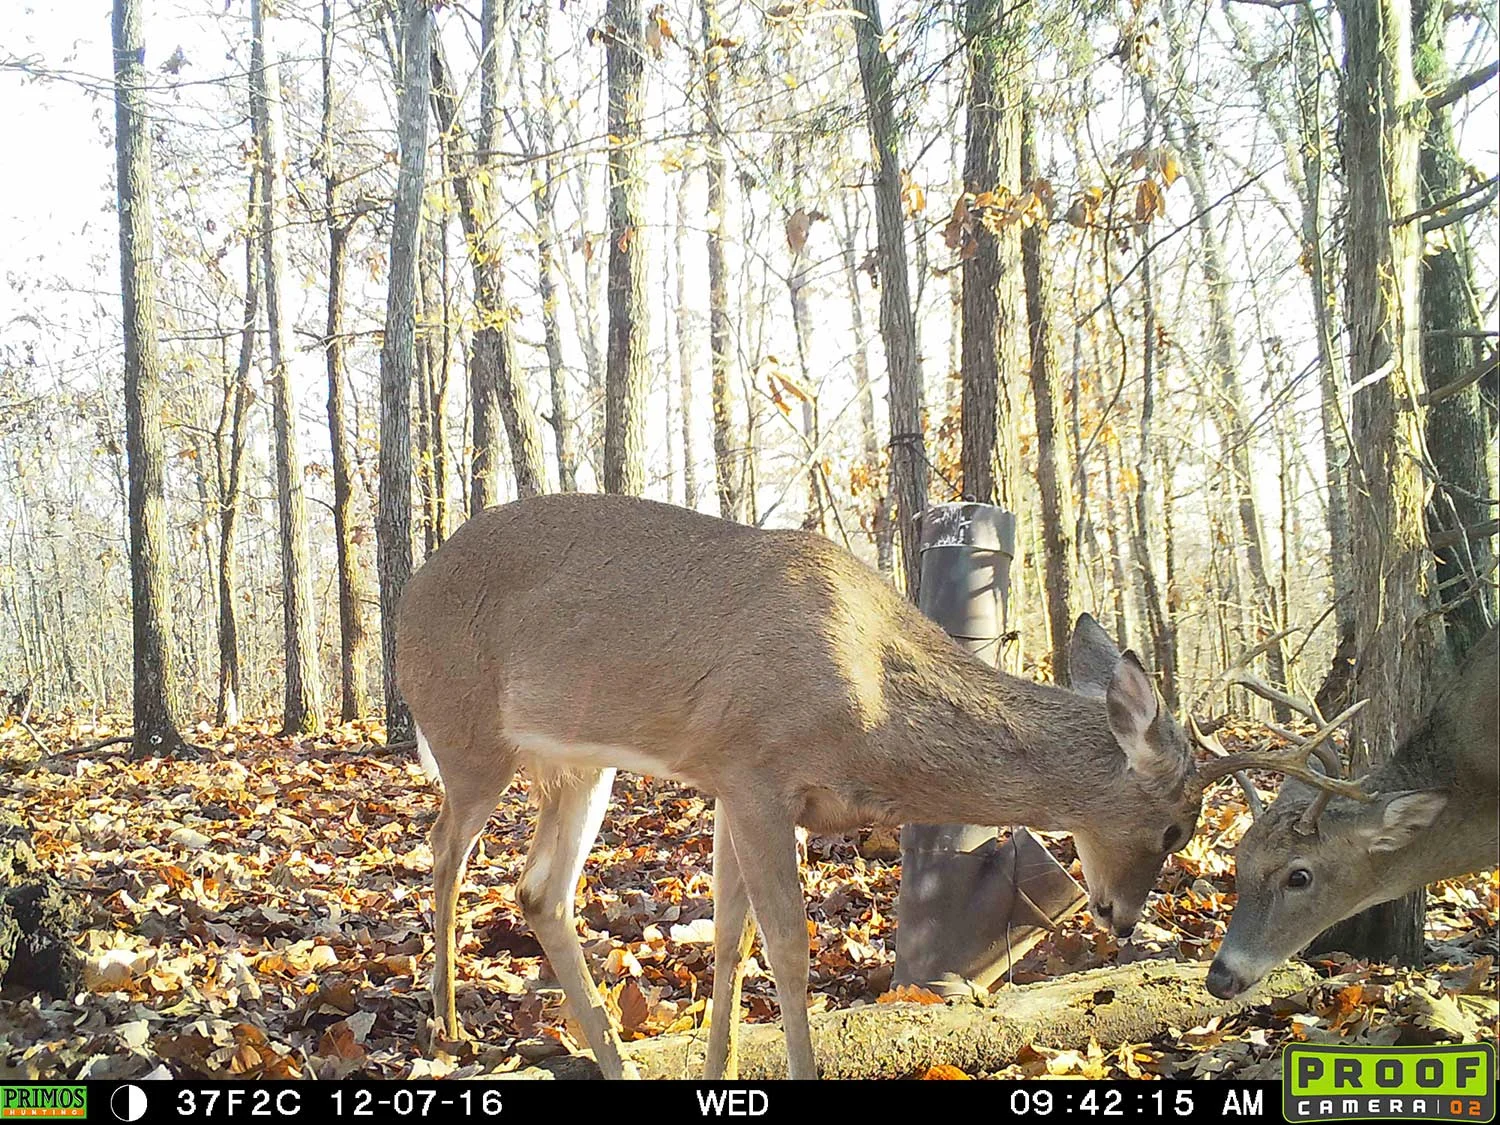
A perfectly placed trail camera caught these two bucks sparring. Will Brantley
“Another big thing is what to do with those photos,” Helin said. “I tell people all the time to organize them. I try to name a deer if it’s older deer. I’ll put those photos in a folder on the computer. I’ll note what deer it is and what ridge it’s on. And I’ve killed multiple mature deer doing that, keeping those records from year to year.”
Running trail cameras might seem like a lot of work, but the results are more than worthwhile, whether they contribute to hunting success or simply entertain you during the off-season. “They’re so useful as a tool to help you scout and help you do what you need to be more successful,” he said. “And it’s fun. That’s why I like to leave them up 365 days a year. Because it gives you that entire year of documentation.”